Please check the Developer’s Guide in advance
If you want to add new font files to Ion, you will need to have them in the following formats to account for the widest support across browsers:
- .eot (IE 6-9)
- .ttf (Safari, Android, iOS)
- .woff (pretty modern browsers)
- .woff2 (really modern browsers)
- .svg (iOS legacy)
If these files are ready to go, follow the steps below. If you don’t have these font files and instead are using a third-party to host your fonts (i.e. Google Fonts, Typekit, etc.), go to this help article here.
First, click the Libraries tab and then select Frameworks to get to the Frameworks Library:

Click the “ion Framework 4” link (or the Framework you’d like to apply the font within):

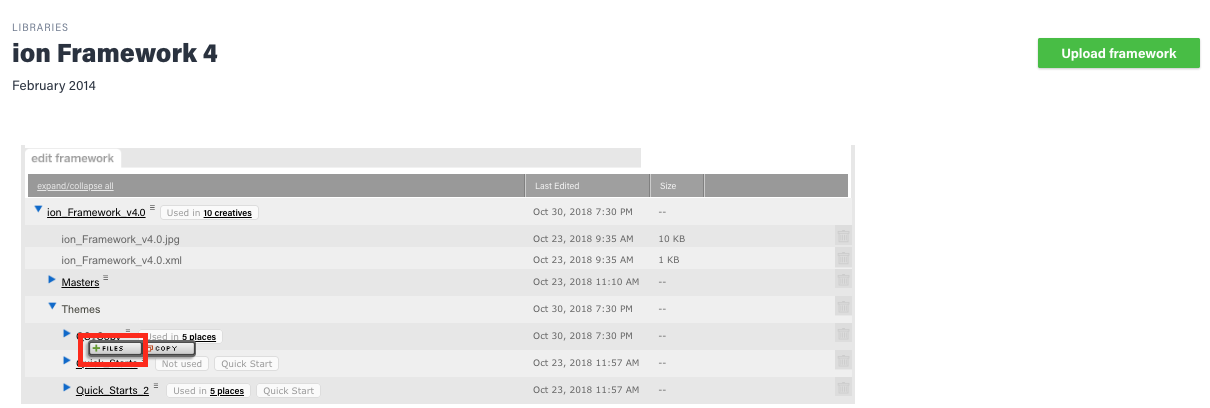
Click “Themes” to show all of the Themes that exist in the Framework, hover over the Theme you would like to apply the font to and click on the “+ Files” button that appears. This will open up the Add or Replace Files dialog. You can either drag your files into this window or click “Browse” to locate your files:

Now that you’ve added the font files to the desired Theme, click into the “theme.css” file to access the main style sheet. This is where you will declare the font. Be mindful that this requires CSS knowledge.
Above the “html” class, you’ll use the @font-face rule to reference your font files. Below is an example of an @font-face declaration where you’ll replace “MyWebFont” with the font name, and “webfont” in each of the file name’s with your font files:
@font-face {
font-family: 'MyWebFont';
src: url('webfont.eot'); /* IE9 Compat Modes */
src: url('webfont.eot?#iefix') format('embedded-opentype'), /* IE6-IE8 */
url('webfont.woff2') format('woff2'), /* Super Modern Browsers */
url('webfont.woff') format('woff'), /* Pretty Modern Browsers */
url('webfont.ttf') format('truetype'), /* Safari, Android, iOS */
url('webfont.svg#svgFontName') format('svg'); /* Legacy iOS */
}
You have now uploaded the font files, and referenced them in the Theme using the @font-face rule. To use your new font, just add the font family CSS to the elements you wish to use the font:
element {
font-family: 'MyWebFont', Fallback, sans-serif;
}
Add a New Font (Third Party)
Please check the Developer’s Guide in advance
This method assumes that you don’t have font files and are instead using a third party to host the fonts for you. Each third party should provide details for installing the font, but most will use a link reference or the @import rule. For a third party font using the link method, you should have a line of code that looks something like this Google Fonts example:
<link href=’//fonts.googleapis.com/css?family=Open+Sans’ rel=’stylesheet’ type=’text/css’>
The @import rule method should look something like this:
@import url(//fonts.googleapis.com/css?family=Open+Sans);
If you’re not using a hosted font and instead have font files ready to upload, follow the steps outlined in the support post here.
Link Method
First, click the Libraries tab and then select Frameworks to get to the Frameworks Library:

Click the “ion Framework 4” link (or the Framework you’d like to apply the font within):

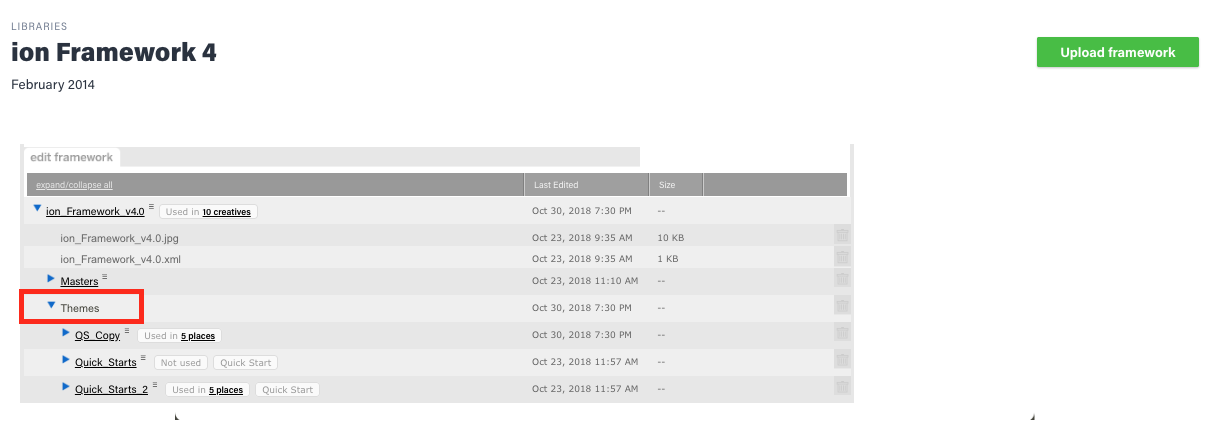
Click Themes to show all of the themes that exist in the Framework, the expand the Theme you wish to add the font to:

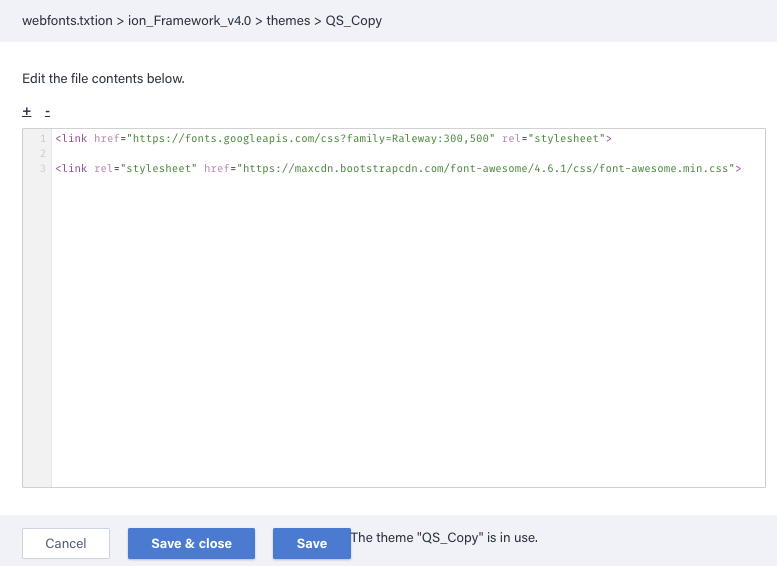
In the list of Theme files, open the file titled “webfonts.txt”. In this text file, you can paste in the link reference. Below is an example of links for both Google Fonts and FontAwesome:

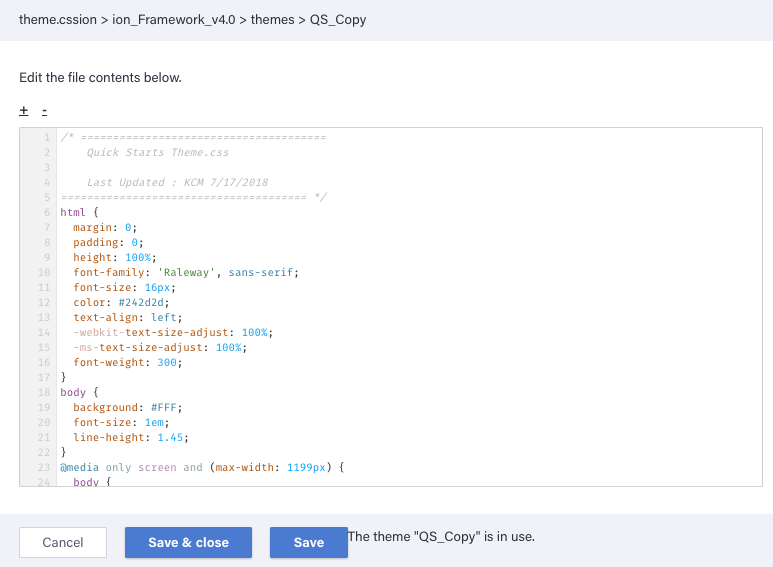
You can now “Save and Close” the webfonts.txt file. To declare the font you’ve linked, click into the “theme.css” file to access the main style sheet. This is where you will declare the font. To use your new font, just add the font family CSS to the elements where you’d like that font family to be used:
element {
font-family: 'MyWebFont', Fallback, sans-serif;
}
@import Rule Method
First, click the Libraries tab and then select Frameworks to get to the Frameworks Library:

Click the “ion Framework 4” link (or the Framework you’d like to apply the font within):

Click Themes to show all of the themes that exist in the Framework, the expand the Theme you wish to add the font to:

In the list of Theme files, open the file titled “theme.css”. This is where you will declare the font.
Paste the @import rule to reference your font files, and be sure to place it above any CSS that may reference the fonts. Below is an example of an @import declaration:

Notice in the screenshot above, the Open Sans font imported using the @import rule being referenced in the html CSS class. Just like this screenshot, you will want to add the font family CSS to the elements where you’d like that font family to be used as well:
element {
font-family: 'MyWebFont', Fallback, sans-serif;
}
To add your fonts as Micro-Theme options, check out the Micro-Theme Developer’s Guide here.


Social Profiles