The Professional Services Tour is an un-gated low complexity quick start that focuses on consultation. This multi-page template includes a landing page along with 6 separate pages that focus on different topics. This engaging template includes video backgrounds, scroll-to-sections and other interactive elements. Each page is in the same layout so visitors become familiar with what information is to be expected in each section. This template is perfect for large amounts of content due to the number of individual pages. On the interior pages, a sticky navigation bar is displayed on the top so visitors can switch between different pages for their convenience. At the end of each page, visitors can sign up for your company’s newsletter.
- Type: Microsite
- Complexity: Low
- Use case: Consulting B2B
Features available
Here are the major features, abilities, and interactive elements used in this template.
- Anchors
- Animations
- Form
- Video
How-to use
Here is a helpful guide on how to handle all the major features, abilities, and interactive elements available to make the most out of this template.
Anchors
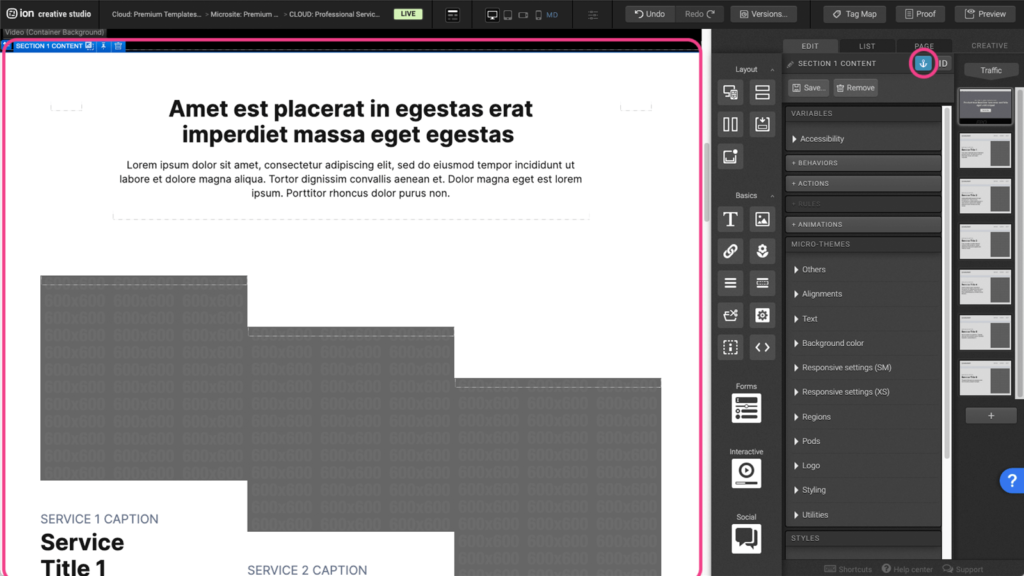
Step 1: Select a section where you want the CTA to scroll to then add an anchor by clicking on the Anchor Icon.
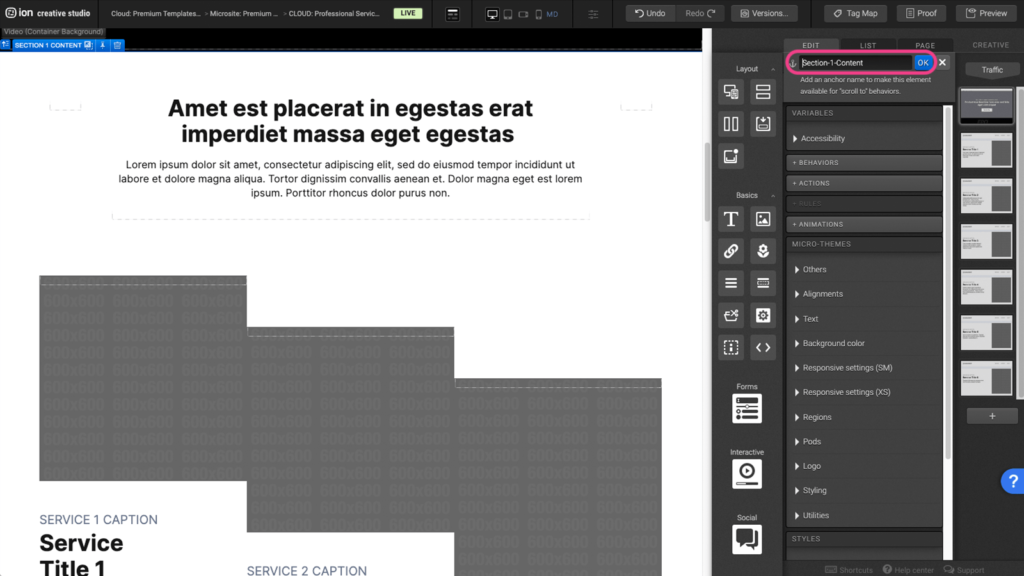
Step 2: Assign a unique name for the anchor and press OK.
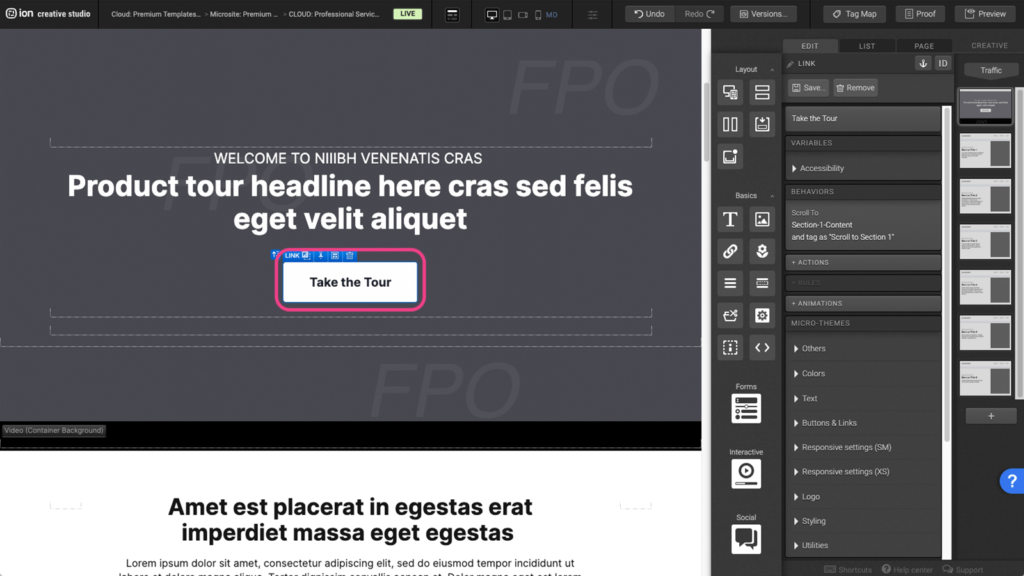
Step 3: Select the element that will link to the anchor and click under the Behaviors panel to open the edit window.
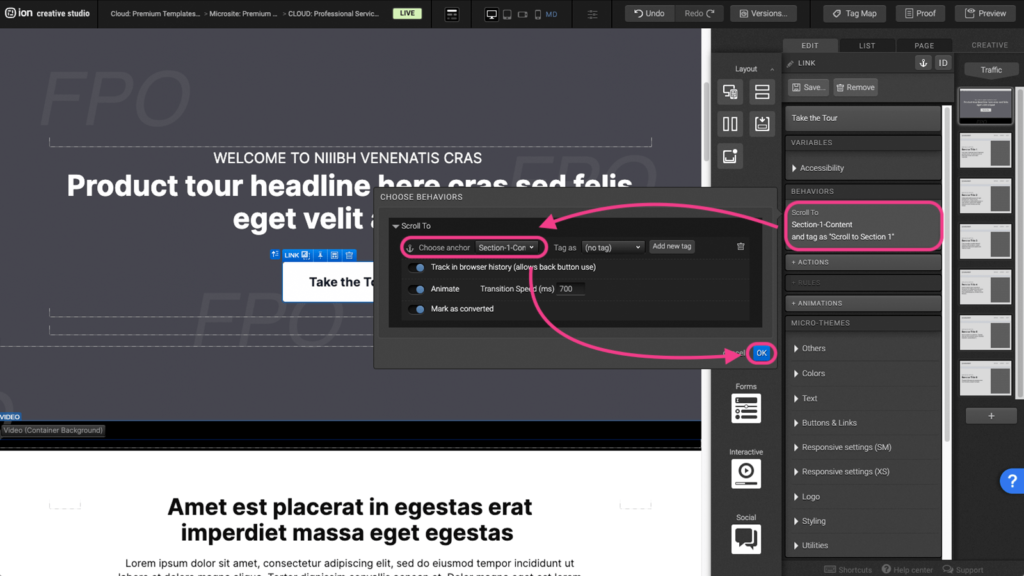
Step 4: Choose the anchor that was previously assigned, from the dropdown menu, then press OK.
Animations
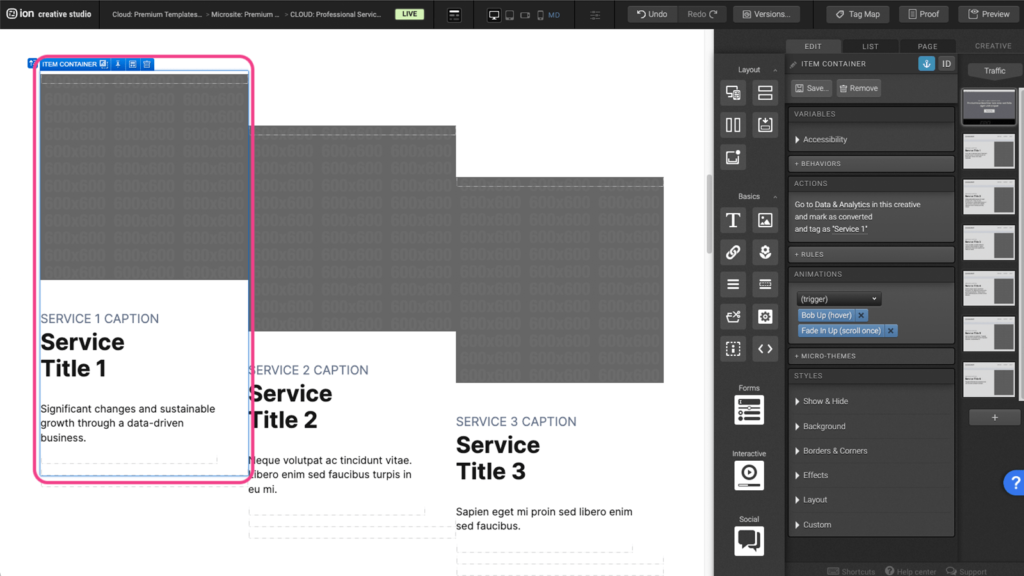
Step 1: To add or edit an animation, first select the element you wish to animation on the canvas.
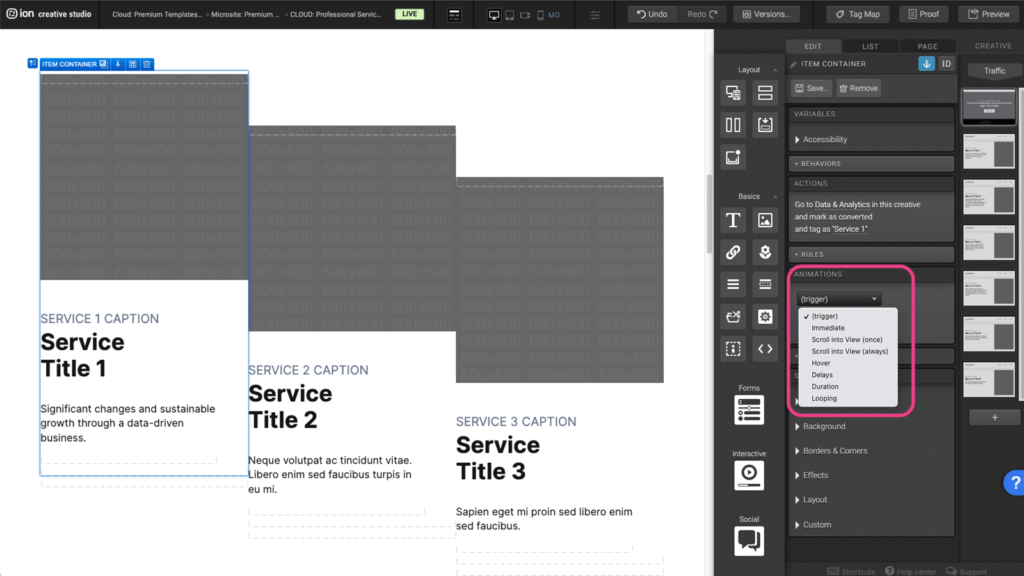
Step 2: Under the Animations panel, expand the (trigger) dropdown and select an animation trigger.
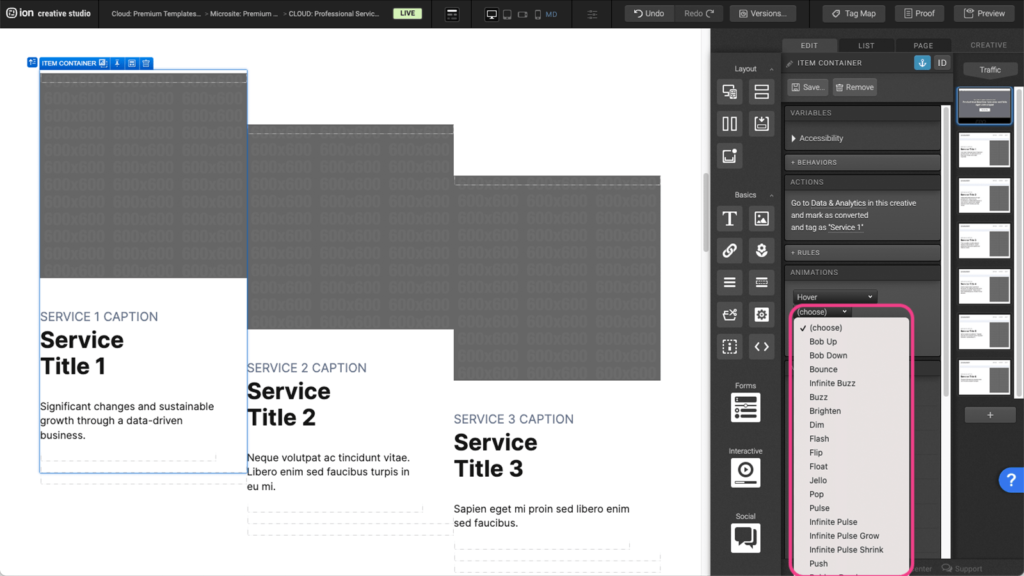
Step 3: After selecting the trigger, click on the (choose) dropdown to select the desired animation.
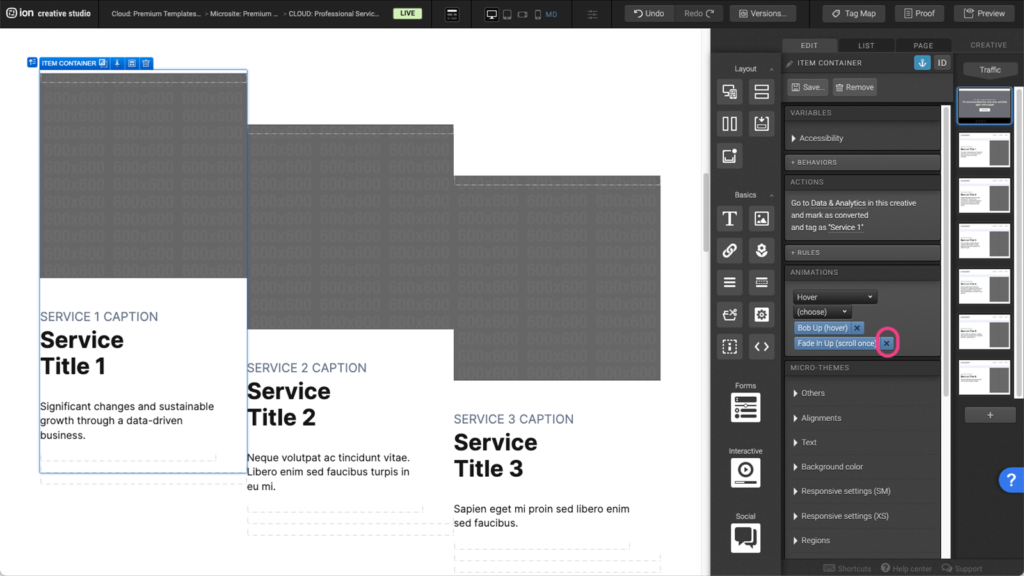
Step 4: To remove an existing animation, click on the X to the right of the blue animation tag.
Form
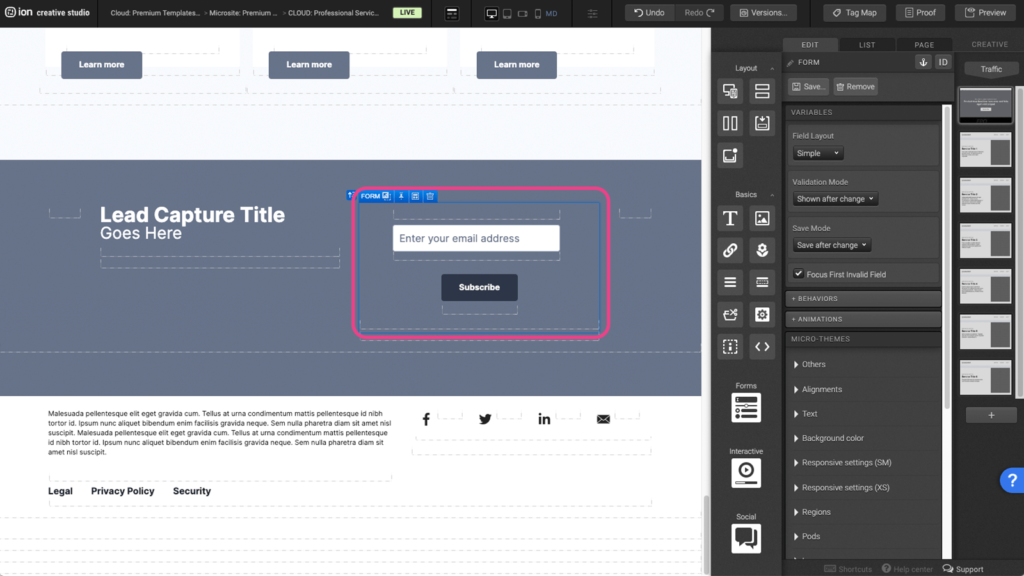
Step 1: To edit the form field within your form, locate the Form element on the canvas.
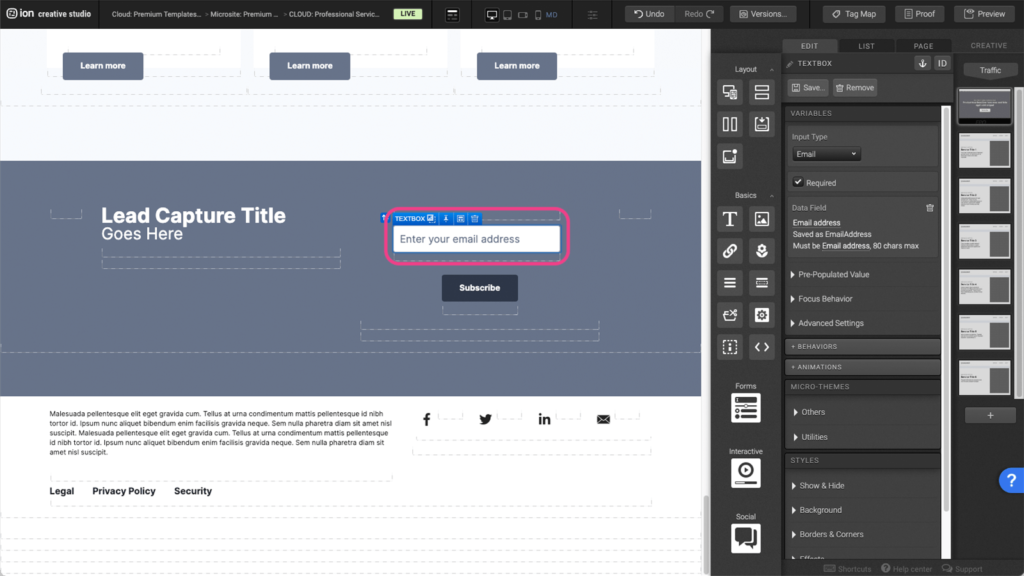
Step 2: Select the Textbox element within the Form field element.
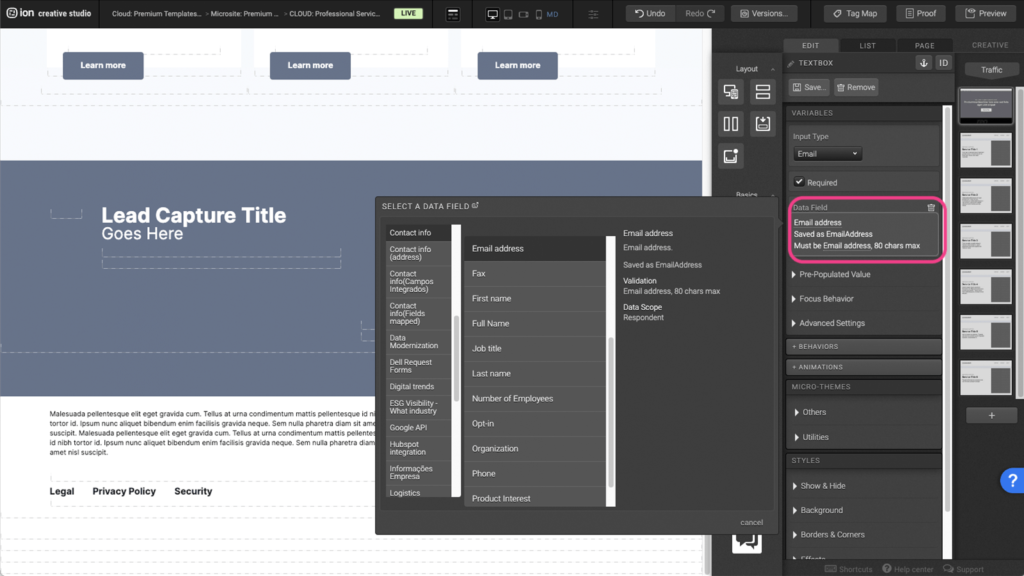
Step 3: Under the Variables panel, click under the Data field panel to open the edit options.
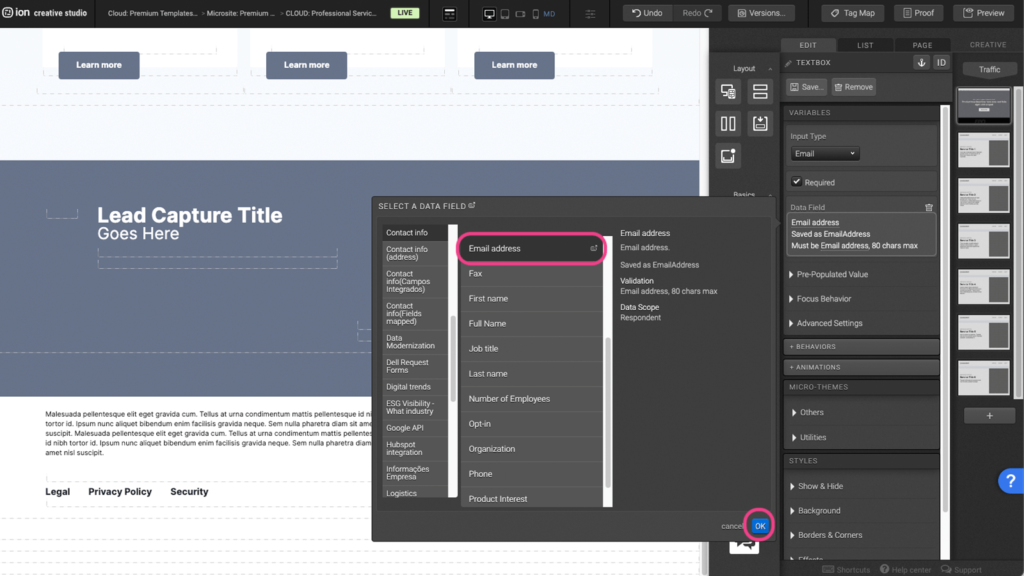
Step 4: Select the data field you wish to apply then press OK to save.
Video
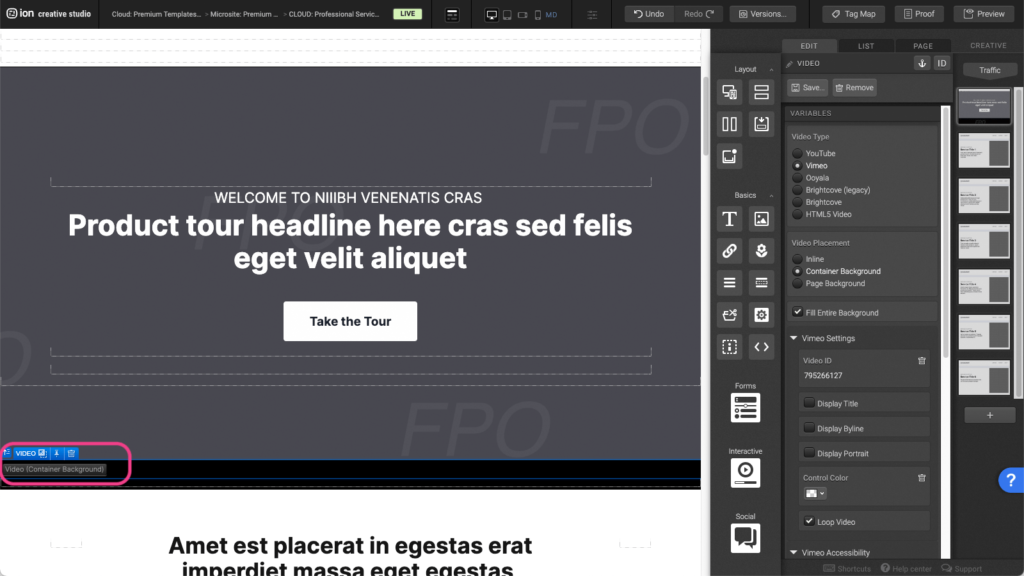
Step 1: To edit the video background, first select the Video (Container Background) element on the canvas.
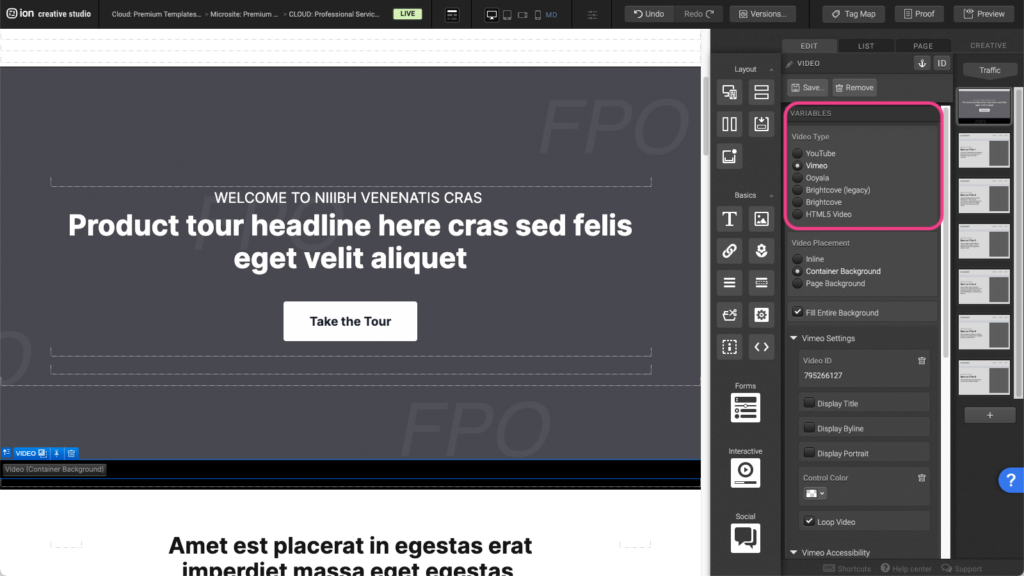
Step 2: Under the Variables panel, select your Video Type. Each video type will have slightly different settings.
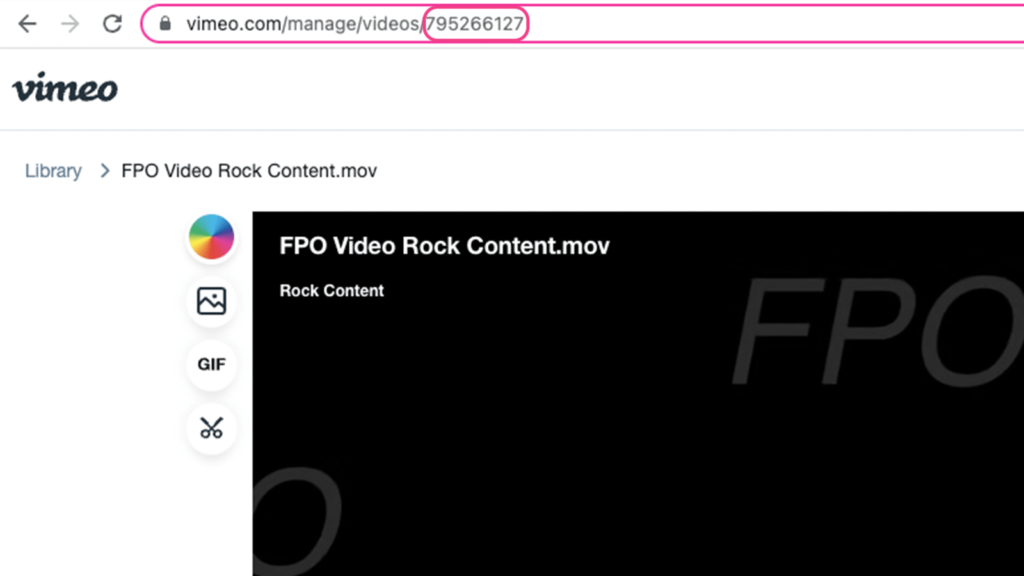
Step 3: Depending on the video type you selected, you will need to find the video ID of your video. In this example, we are using a Vimeo video source. The video ID can be found after the slash on the vimeo link.
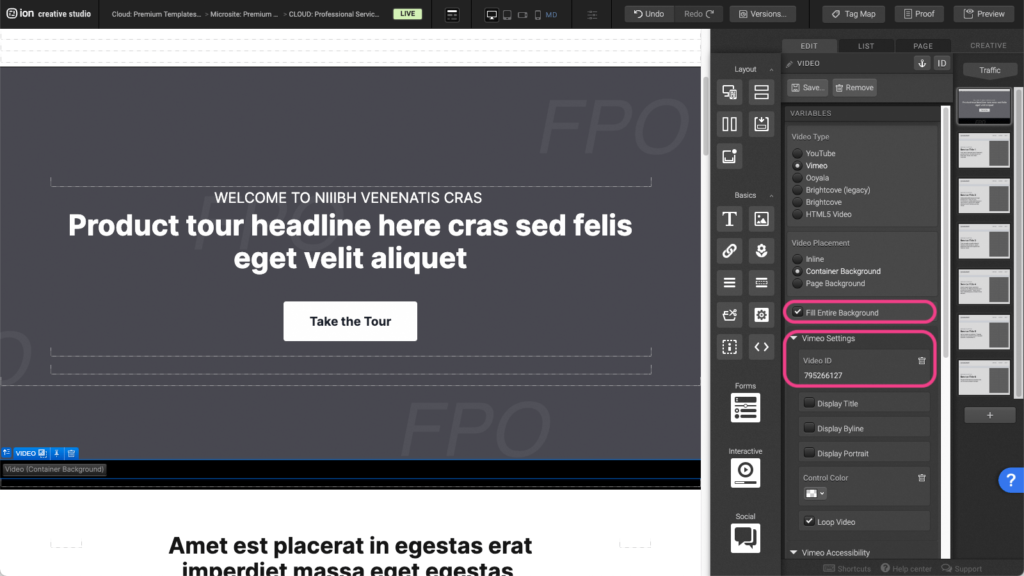
Step 4: Copy the numbers at the end of the link and paste it in the Video ID tab. Make sure the Fill Entire Background box is selected.
Content Writing Template
Here is the content structure’s template to make it easier for you when providing content guidelines or creating the copy for this template, from understanding the content structure to getting to know the amount of words needed to each text piece.
Related templates
If you like this template, you might want to check out these other similar models.
Have a question?
Still have questions or are facing troubles when handling this template? Please do not hesitate to send any additional questions to [email protected], so we can make sure to have this article constantly up to date.



Social Profiles