Showcase your content with the Image-focused eBook including exciting images, enticing the user to jump right into their desired topic and navigate through a diverse range of interactive components. This template includes several interactive components such as flows, turning a dense content into an fun exploration experience. Users are encouraged to complete a quiz gathering information of their favorite choice.
- Experience type: eBook
- Complexity: Medium
- Use case: Education
Features available
Here are the major features, abilities, and interactive elements used in this template.
- Flow
- Flow as Tabs
- Flow with Layered Navigation
- Lightbox
- Quiz
- Reveals
How-to use
Here is a helpful guide on how to handle all the major features, abilities, and interactive elements available to make the most out of this template.
Flow
Step 1: To change or remove a Flow, begin by selecting the element on the Canvas.
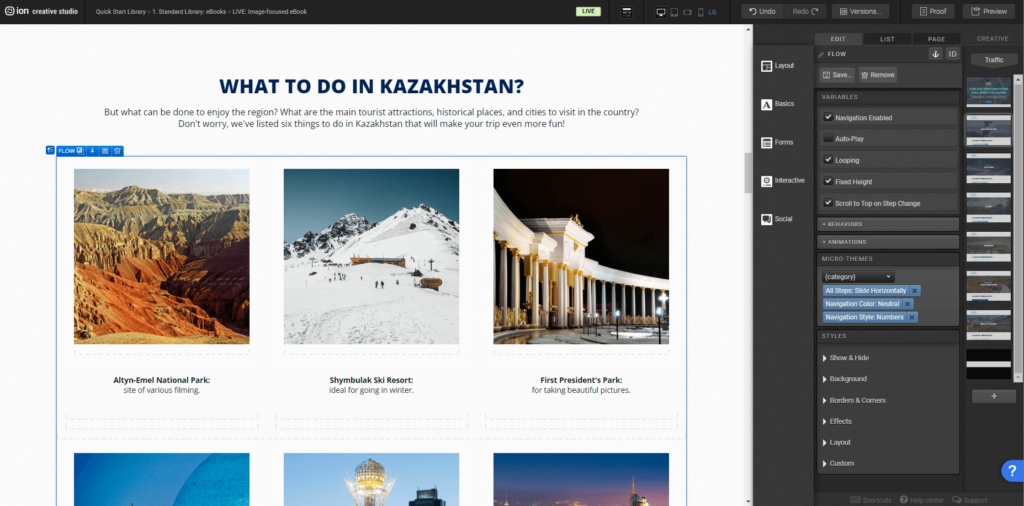
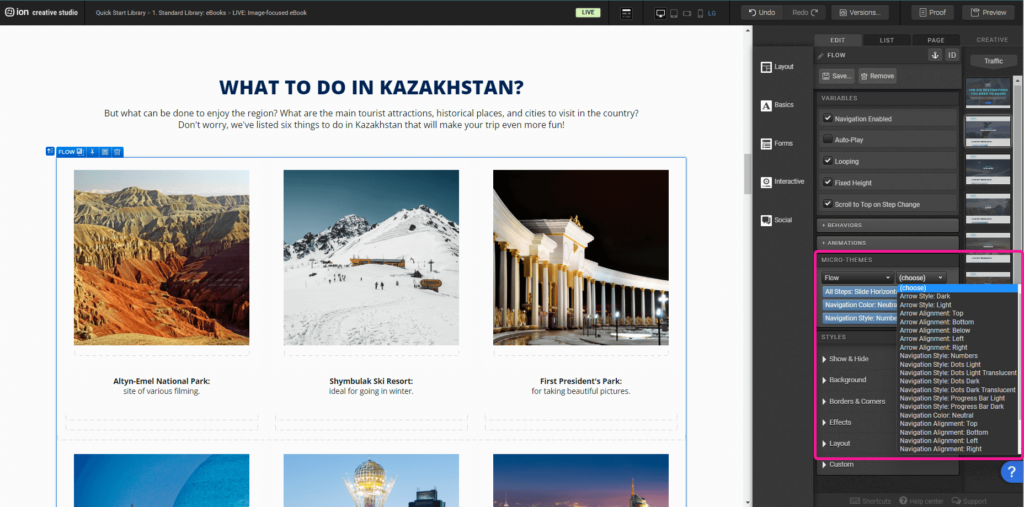
Step 2: You can add and change the style of navigation, on the right side menu under Variables, the option Navigation Enabled must be active. Scrolling down, under Micro-themes, select Flow and choose the navigation style and position.
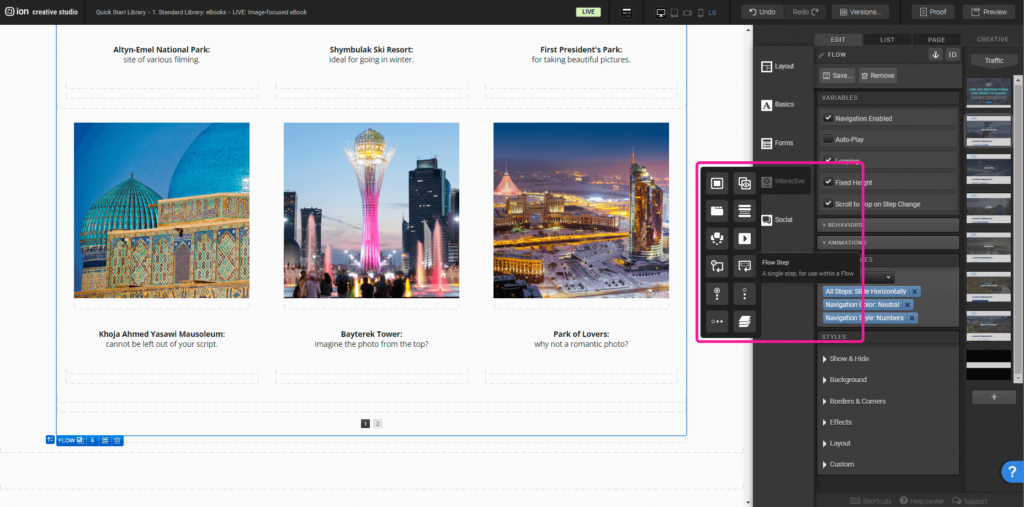
Step 3: If you wish to add a Flow Step you’ll need to add a Flow Step located under the Interactions tab on the right menu.
Flow as Tabs
Step 1: To update the content within your Flow, begin by selecting it on the canvas.
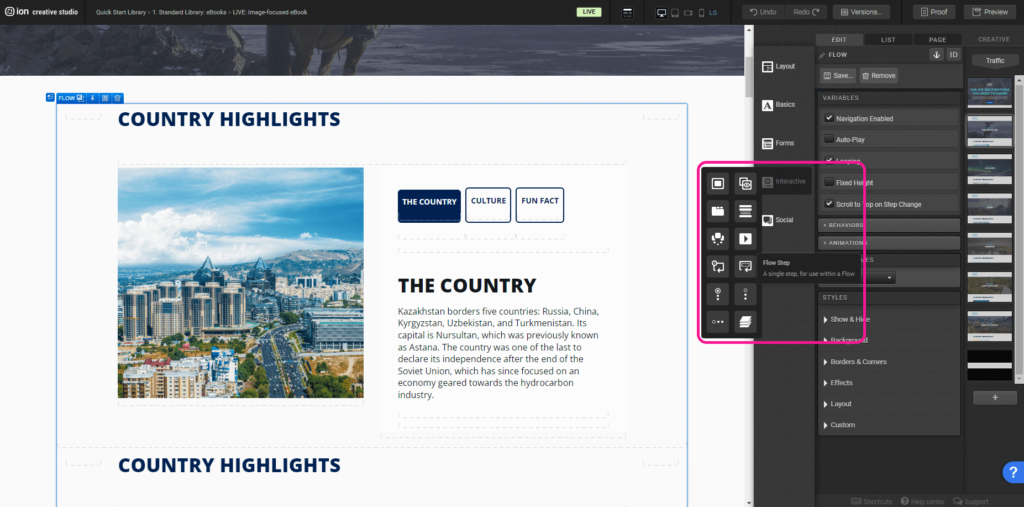
Step 2: Within the Flow, locate the first Flow Step at the top. Within this Flow Step is a Container with two Containers, one with three button-like elements and another with text. You can edit the contents within the containers, add content, or remove all of the content from the Flow Step.
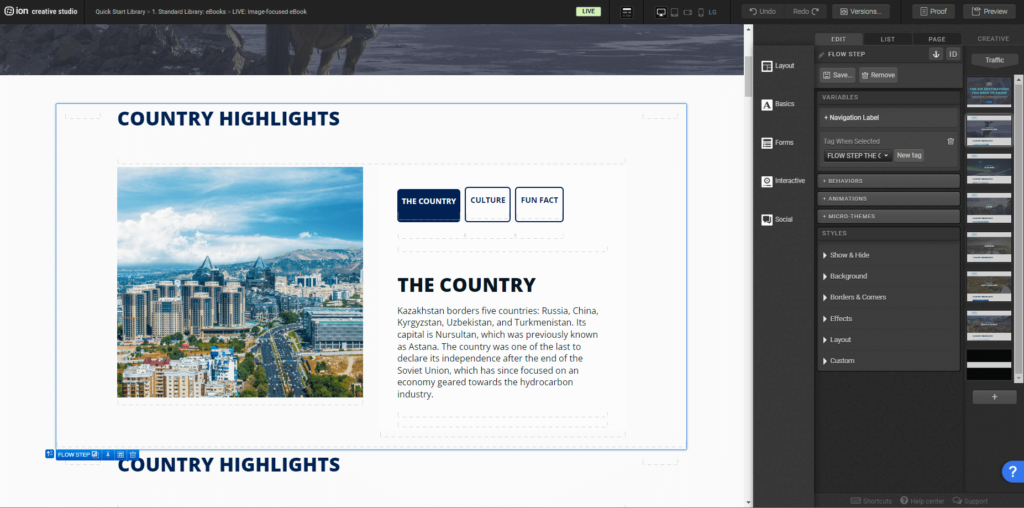
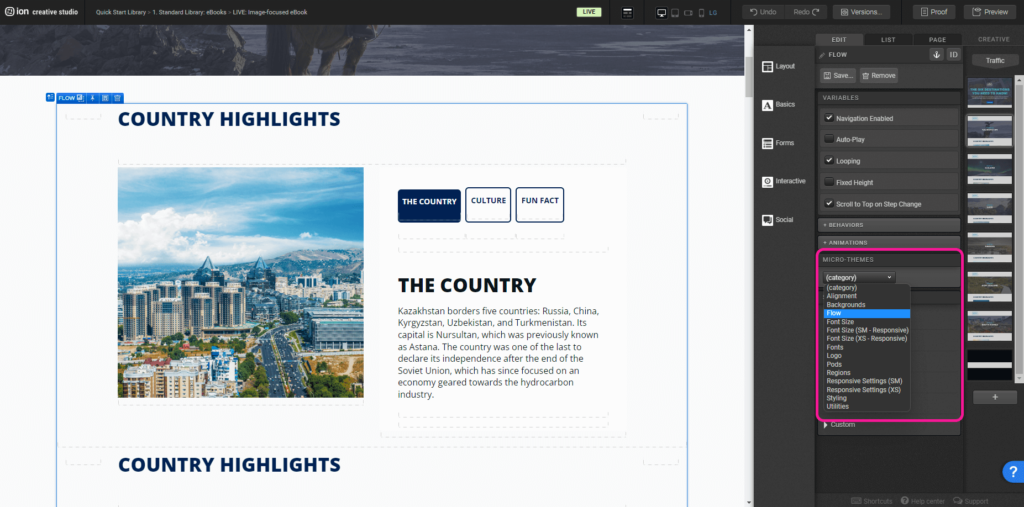
Step 3: You can add and change the style of navigation, with the Flow selected, on the right side menu under Variables, the option Navigation Enabled must be active.
Scrolling down, under Micro-themes, select Flow and choose the navigation style and position.
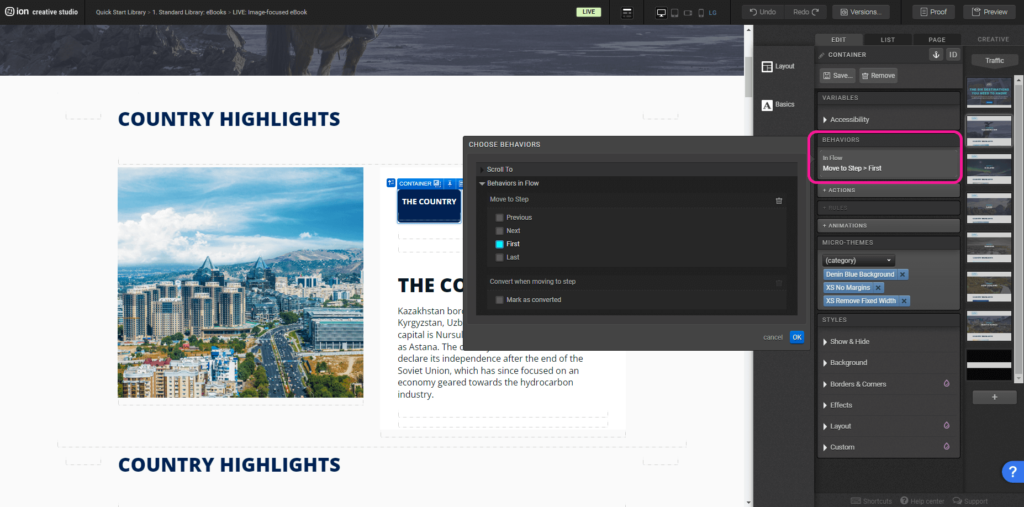
Step 4: There are currently three steps to this Flow, and the button-like elements have the Behavior, Move to Step to each one of them, they are “First”, “Next” and “Last”.
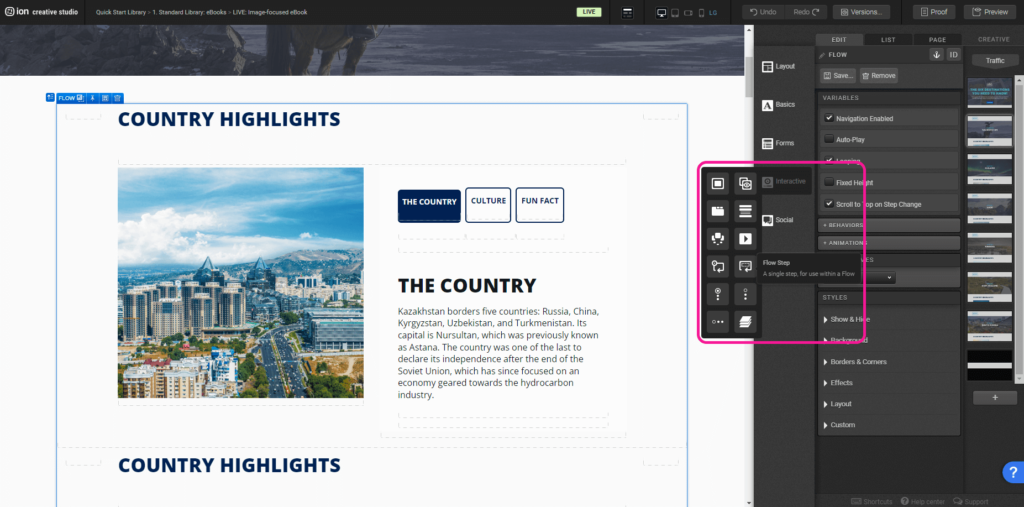
Step 5: If you wish to add a Flow Step you’ll need to add a Flow Step located under the Interactions tab on the right menu. Specifically with this feature, if there’s a need of using more than three Flow Steps you’ll need to change the navigation from Behaviors, Move to Step to using Anchors.
Flow with Layered Navigation
Step 1: To change or remove a Flow, begin by selecting the element on the Canvas.
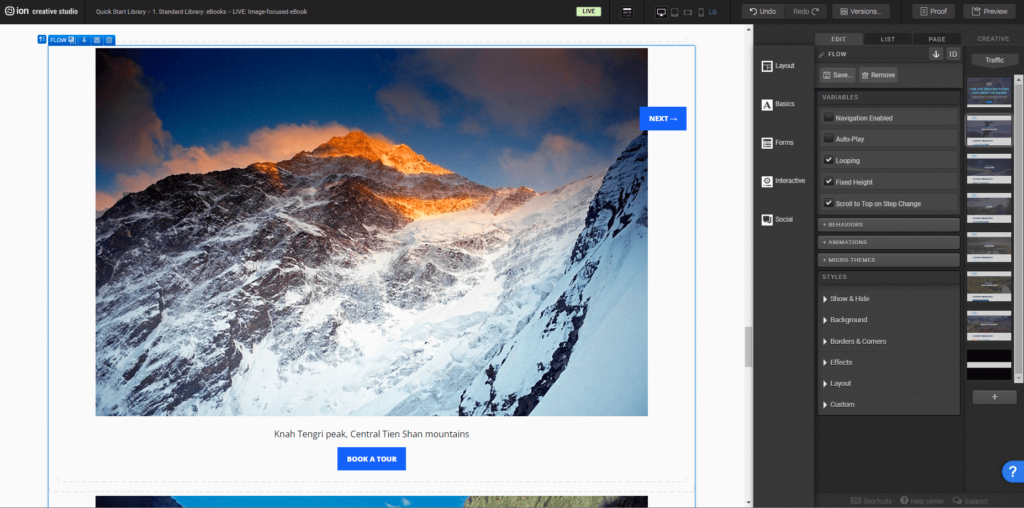
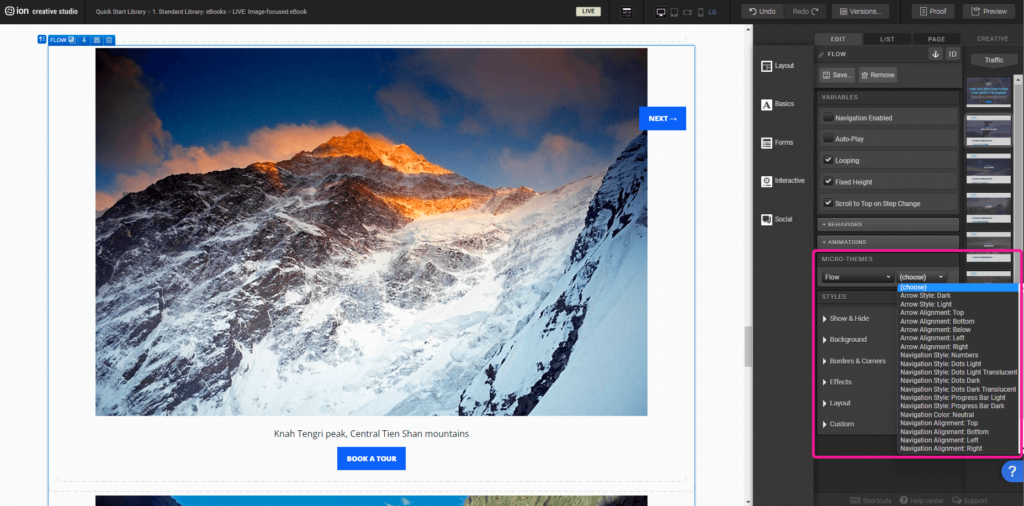
Step 2: You can add and change the style of navigation, on the right side menu under Variables, the option Navigation Enabled must be active.
Scrolling down, under Micro-themes, select Flow and choose the navigation style and position.
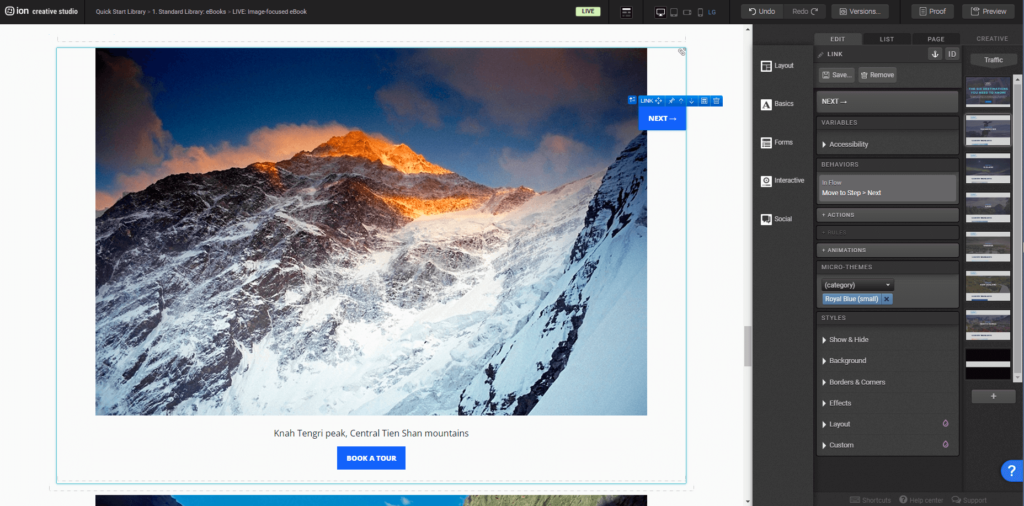
Step 3: There are currently three steps to this Flow, and the button-like elements have the Behavior, Move to Step to each one of them, they are “First”, “Next” and “Last”.
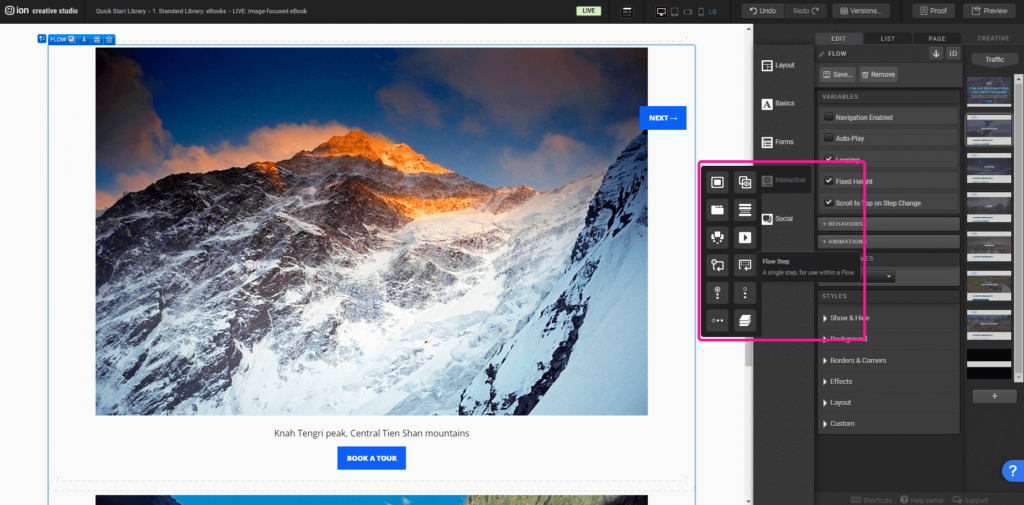
Step 4: If you wish to add a Flow Step you’ll need to add a Flow Step located under the Interactions tab on the right menu.
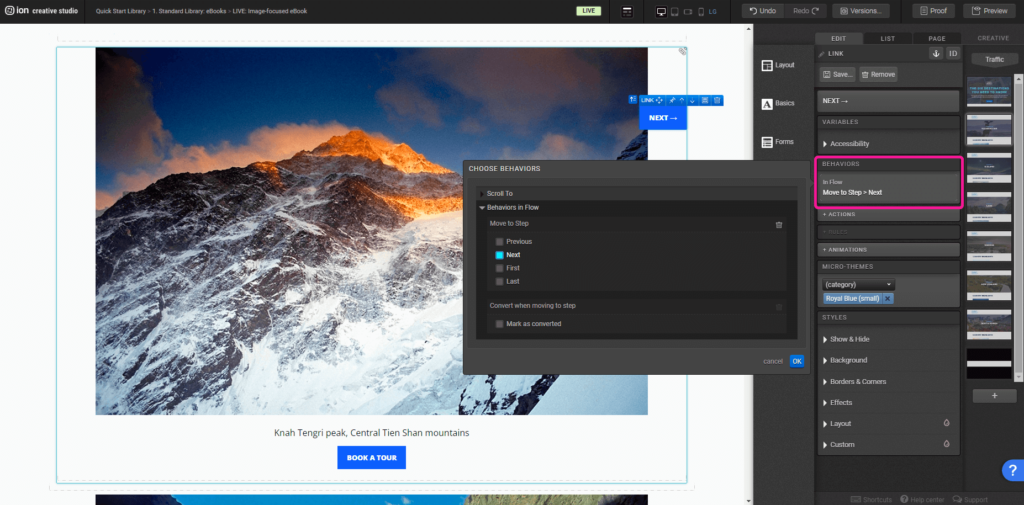
Step 5: To update the navigation, with the Button selected, on the Behavior menu, In Flow select the option Move to Step and the direction desired.
Lightbox
Step 1: To change or remove a Lightbox, begin by selecting the element on the Canvas.
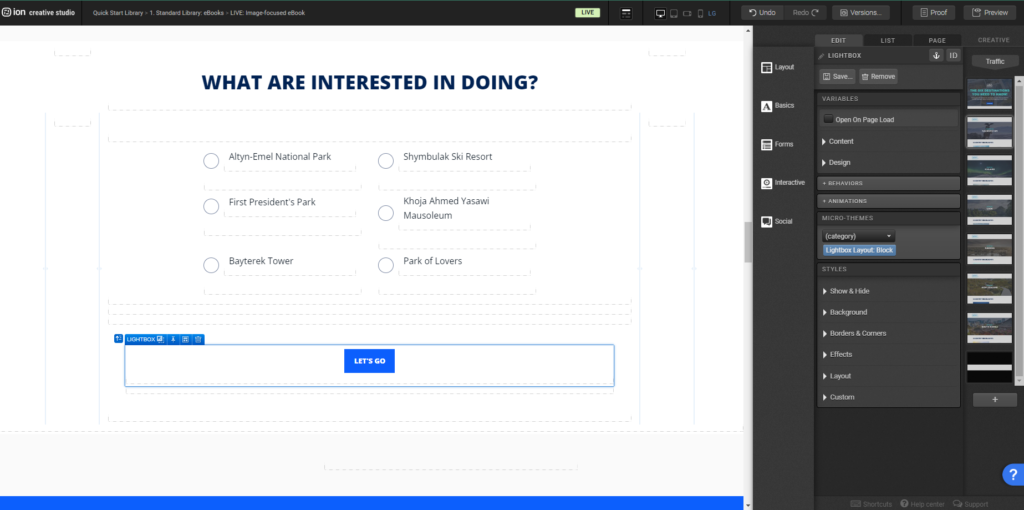
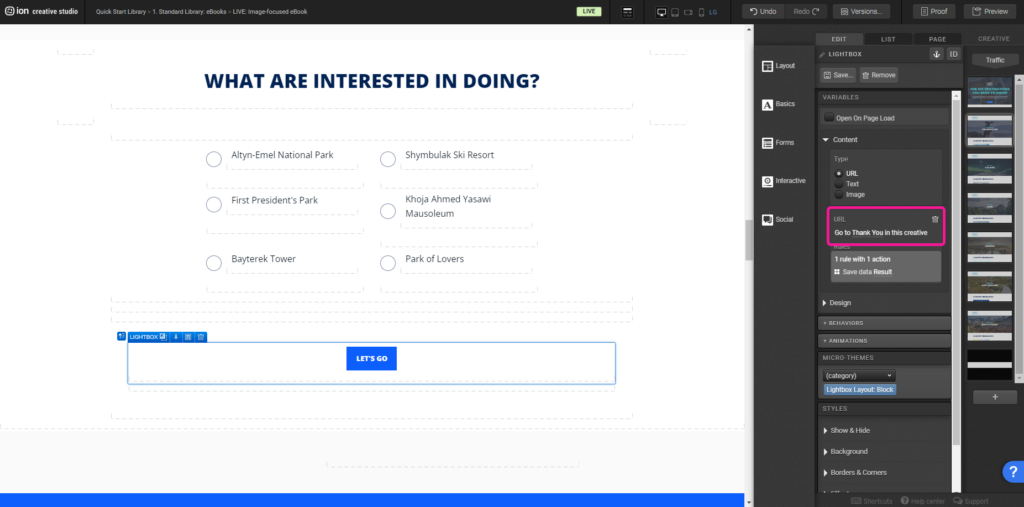
Step 2: The Lightbox is set up to show images from each chapter the quiz was taken, e.g. Quiz Chapter 1 = Lightbox with images for Chapter 1. To be able to that Rules and Show & Hide Conditions were set up. Under the Variables menu, you’ll be able to see the URL it is opening in the Lightbox, also the Rules applied when you open the Content tab.
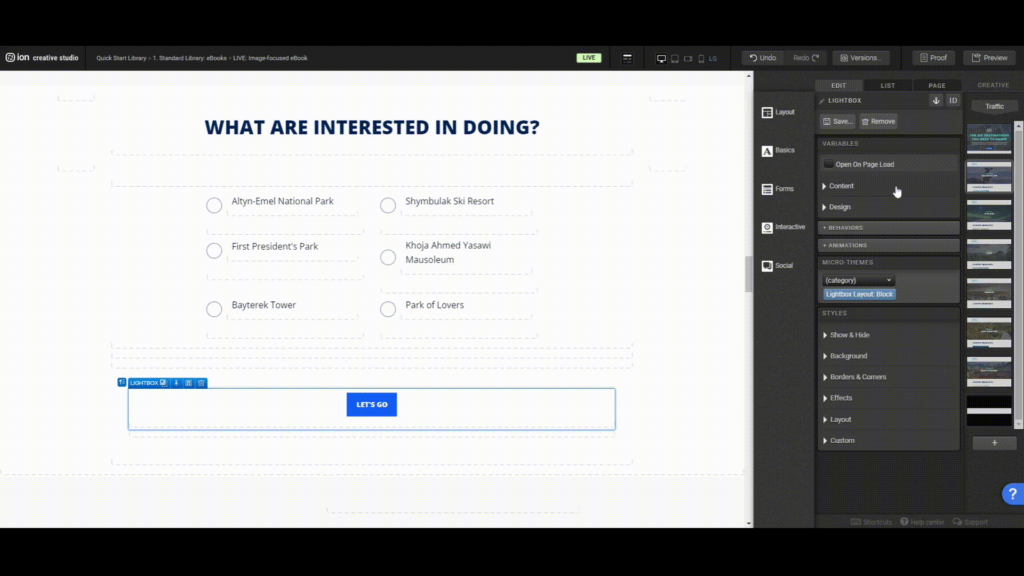
Step 3: To edit the content of what is shown in the Lightbox, open the page Thank You on the far right menu, under Creative.
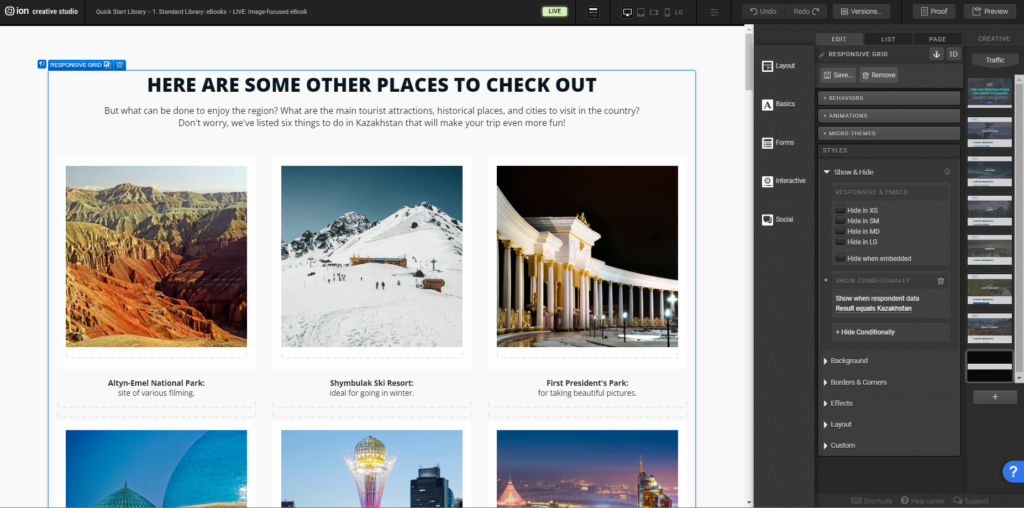
Step 4: Selecting the Responsive Grid on the Canvas. You’ll see a purple dot on Show & Hide in the Styles menu. It’ll show you the condition on which it I’ll be shown, matching the Rule applied to the Lightbox.
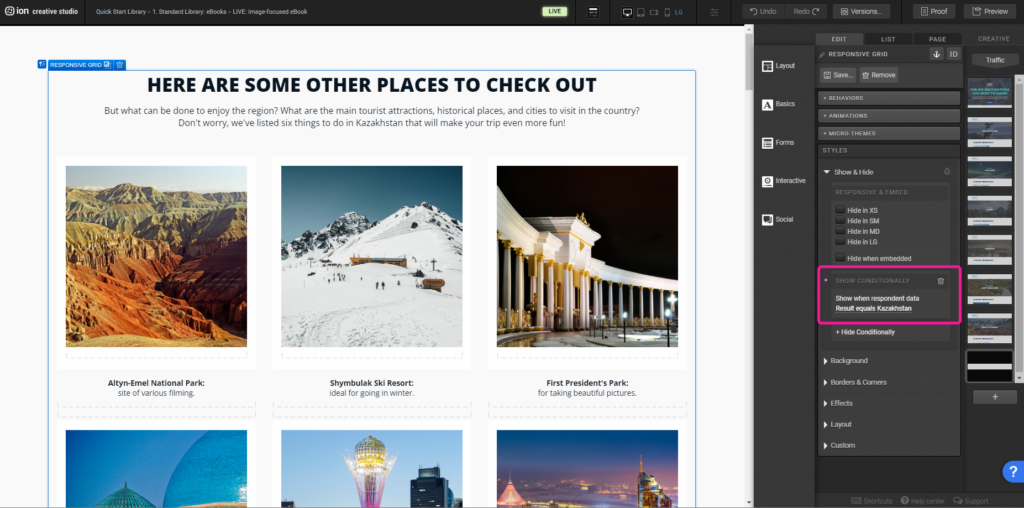
Step 5: Within the Responsive Grid, you can edit the contents, add and/or remove some of the content.
Reveal
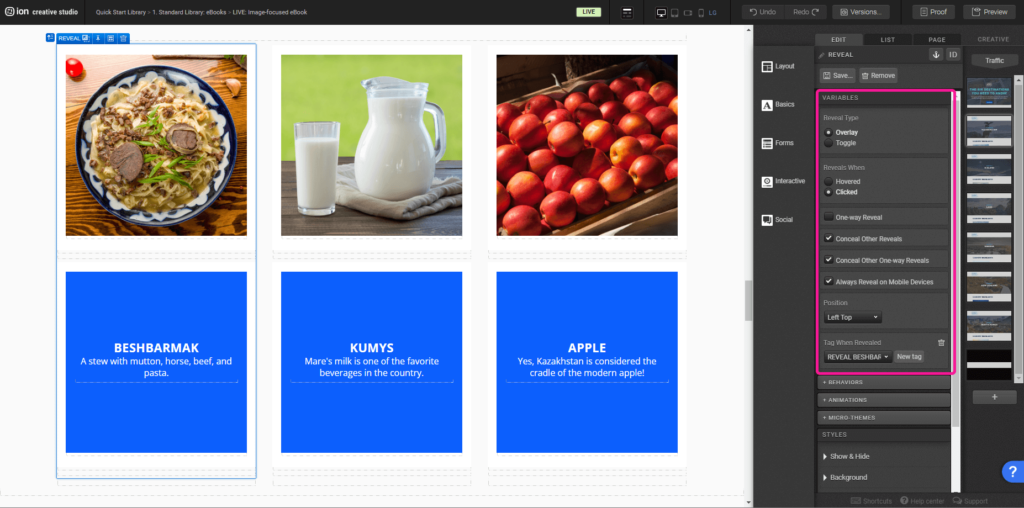
Step 1: To change or remove a Reveal, begin by selecting the element on the Canvas.
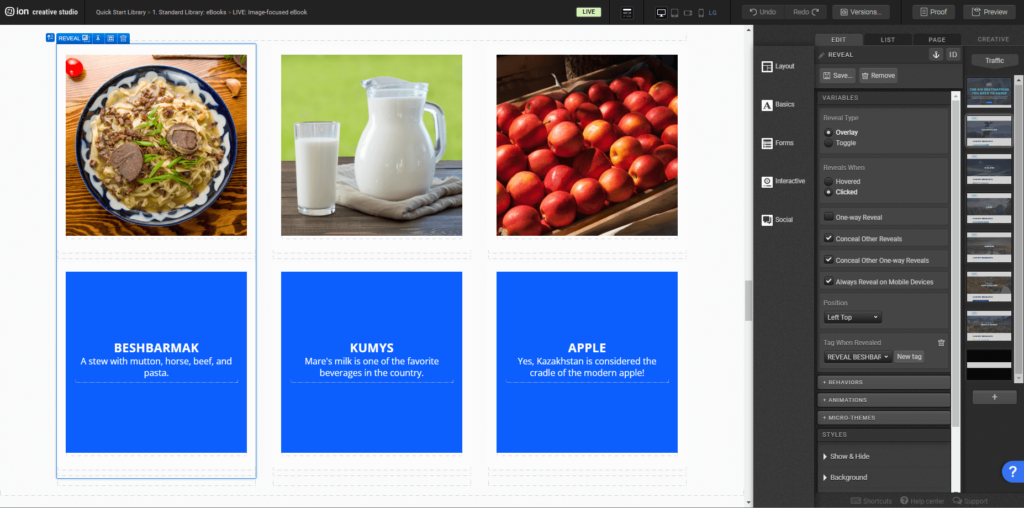
Step 2: A Reveal is made up with two important elements: a Reveal Trigger and a Reveal Container. A Reveal Trigger is as the name suggests, what triggers the revealed content, the first first shown. A Reveal Container is what lies after.
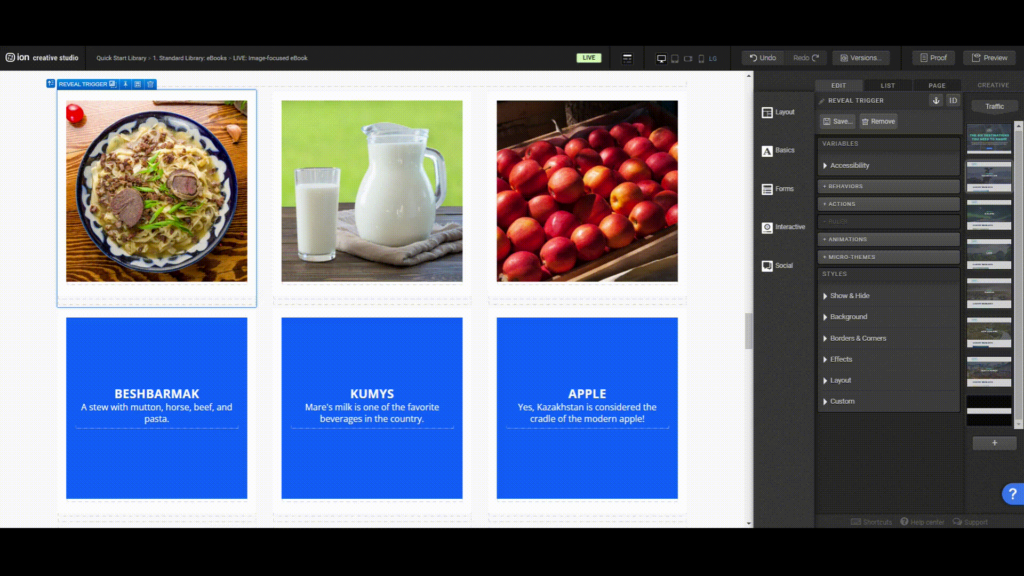
Step 3: With the Reveal selected, you’ll be able to edit its variables, under the Edit tab, Variables section. You can change the type, when and how it’ll interact with other Reveal components and on mobile devices. Also the Position of how Reveal Container will be shown in relation to the Reveal Trigger. Lastly you’ll be able to tag the Reveal.
Content Writing Template
Here is the content structure’s template to make it easier for you when providing content guidelines or creating the copy for this template, from understanding the content structure to getting to know the amount of words needed to each text piece.
Related templates
If you like this template, you might want to check out these other similar models.
Have a question?
Still have questions or are facing troubles when handling this template? Please do not hesitate to send any additional questions to [email protected], so we can make sure to have this article constantly up to date.


Social Profiles