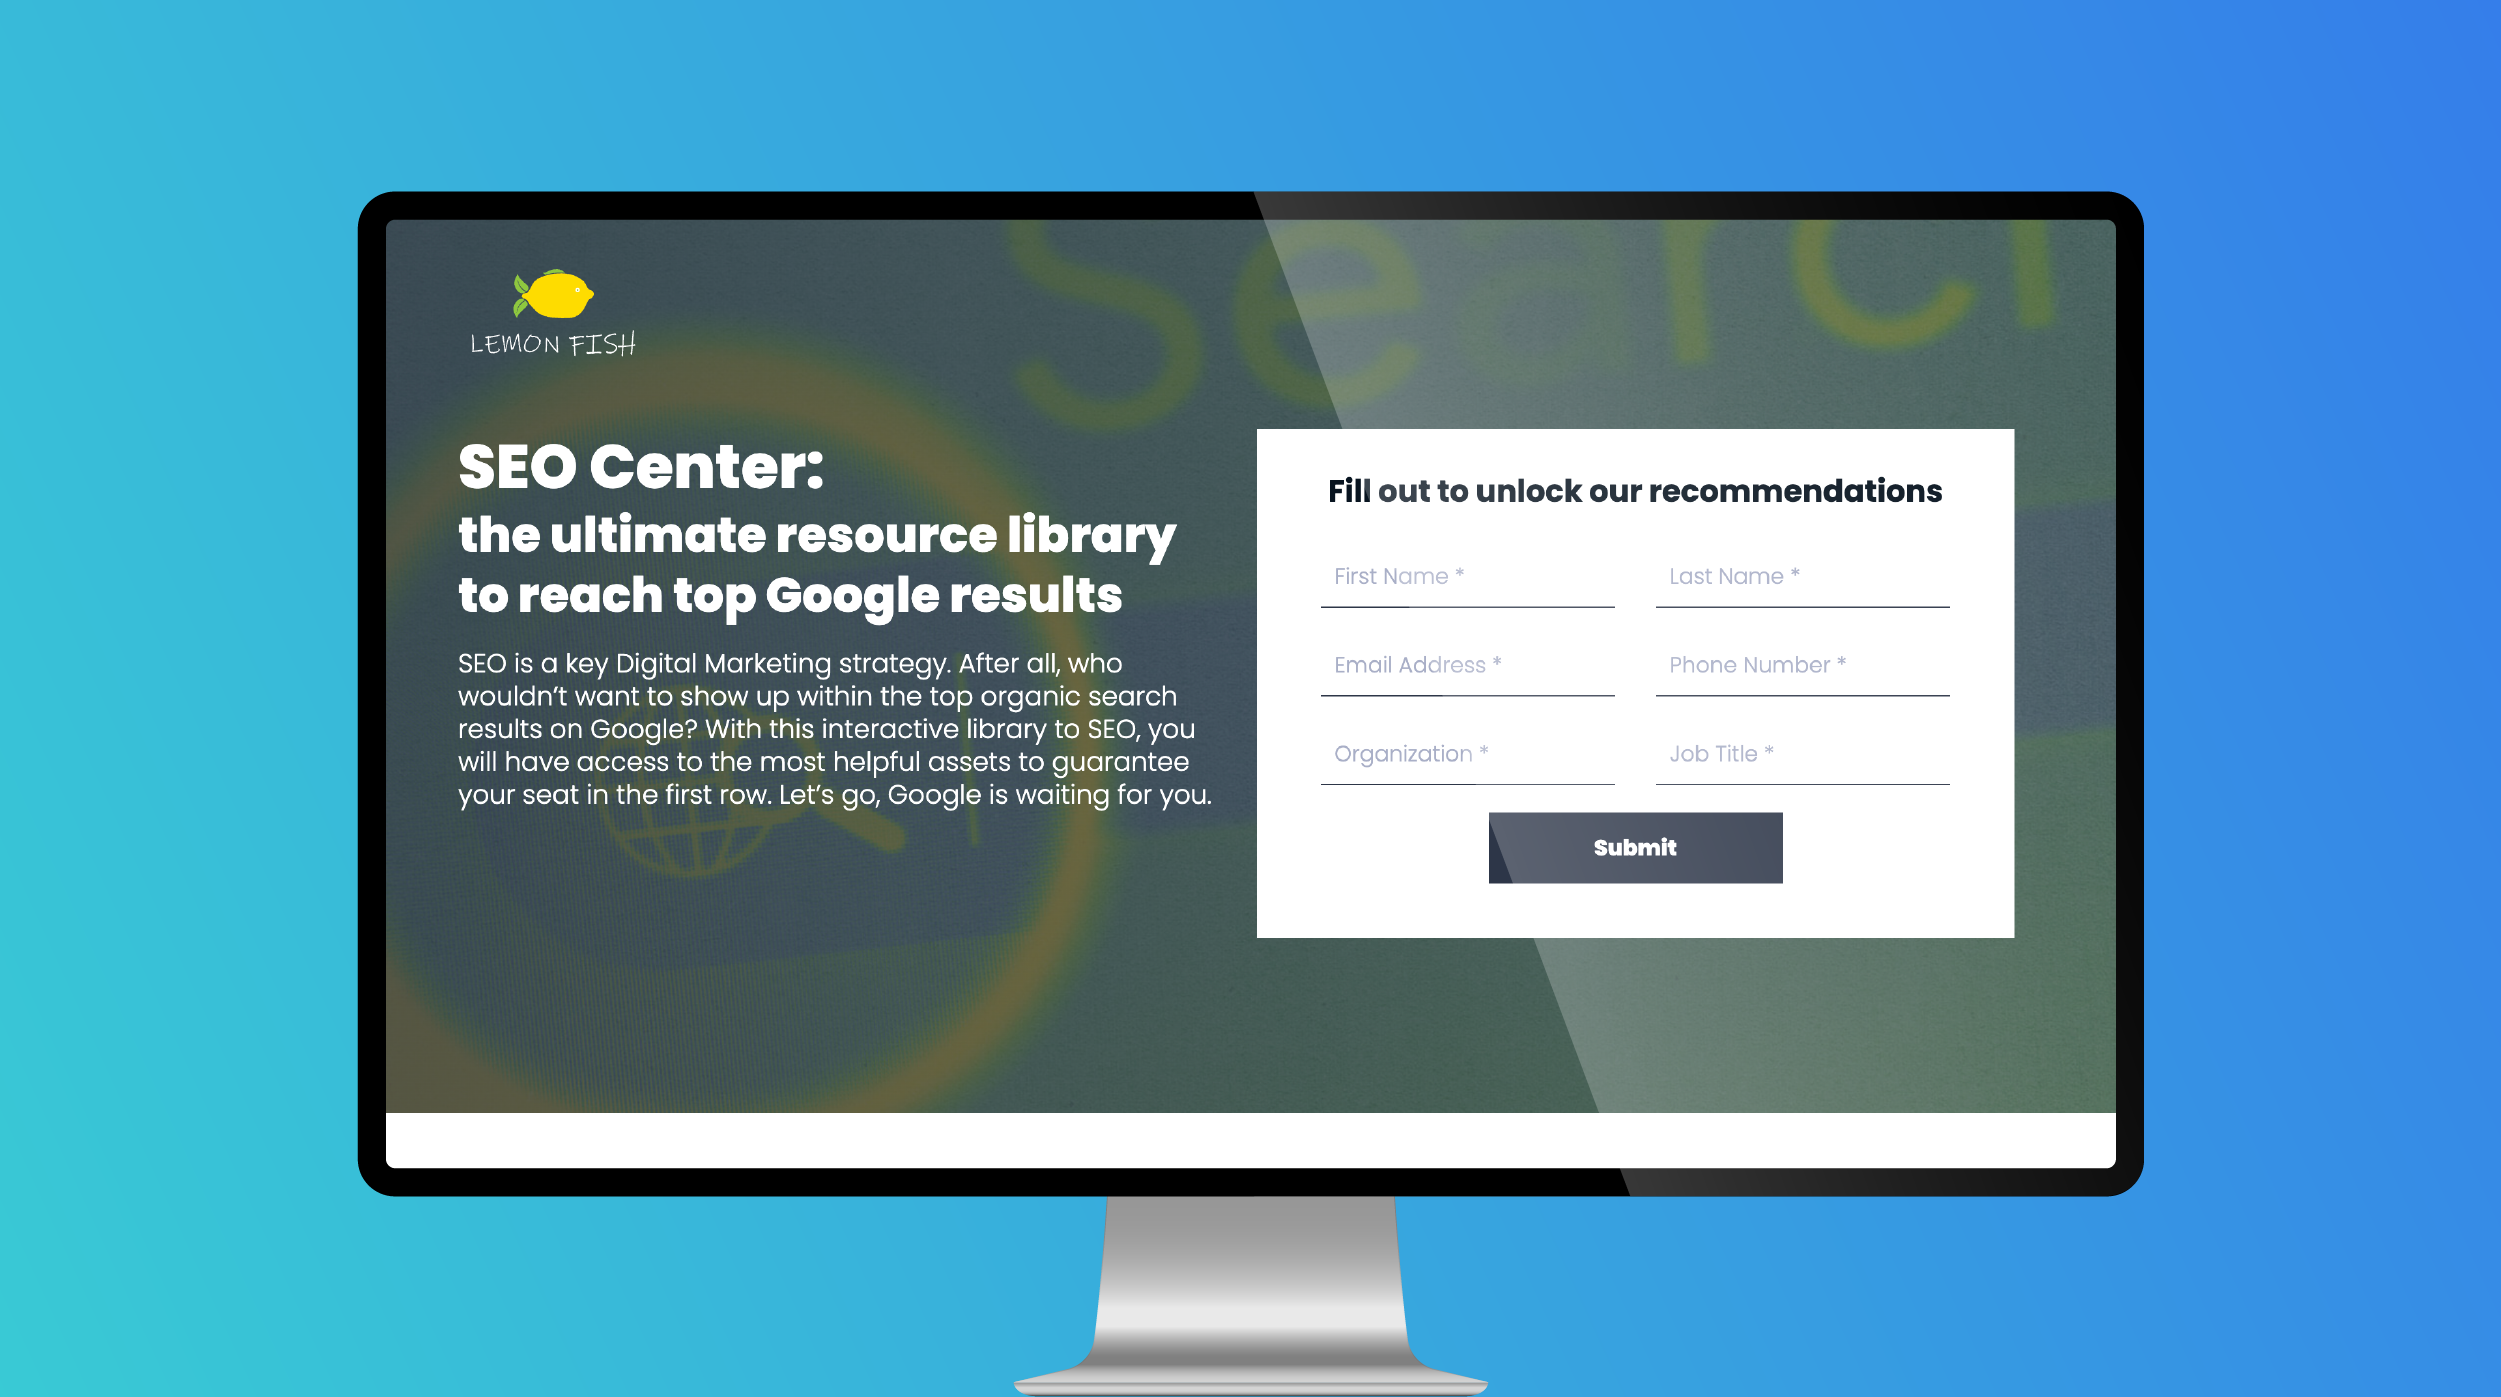
The Easy White Paper is a basic long page, with 6 chapters and a form at the end to encourage lead generation. With a sticky top navigation, users have the option to easily scroll to different sections of the page. This low complexity template includes a variety of different features such as: tabs, accordions, reveals and many more. The Easy White Paper is an excellent beginner template to convert large amounts of content to something more digestible.
- Type: White Paper
- Complexity: Low
- Use case: Lead Generation
Features available
Here are the major features, abilities, and interactive elements used in this template.
- Anchor
- Animations
- Flow
- Form
- Lightbox
- Reveal
- Tabs
How-to use
Here is a helpful guide on how to handle all the major features, abilities, and interactive elements available to make the most out of this template.
Anchor
Step 1: Select an element that you want as an anchor point. Assign an anchor by selecting the Anchor icon under the Edit panel then press OK.
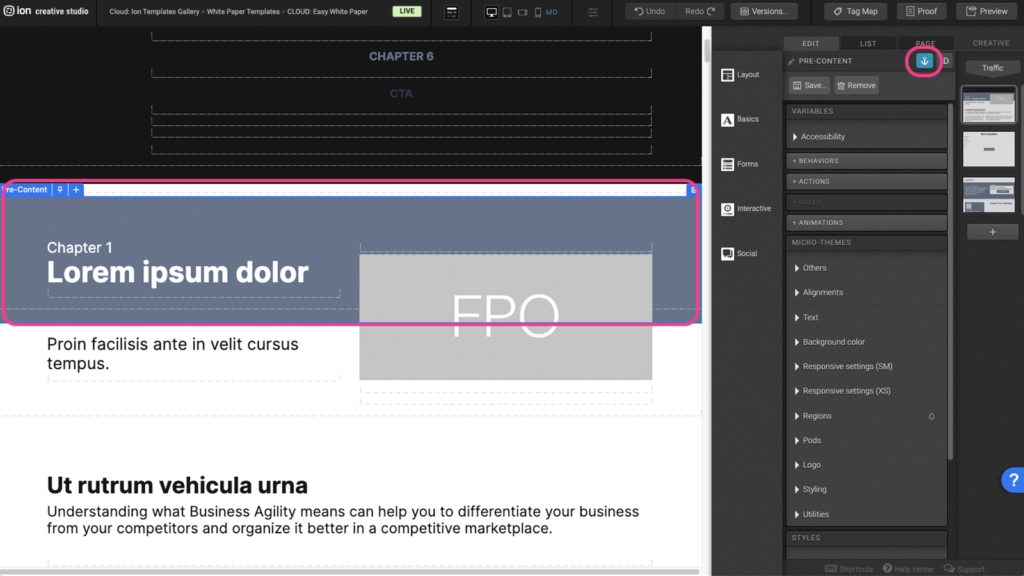
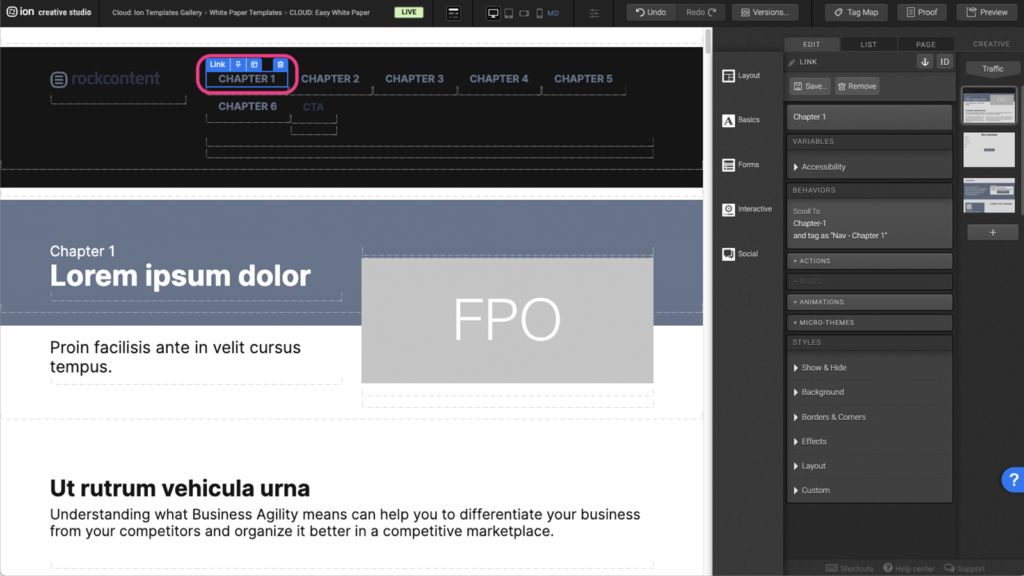
Step 2: Select an element you wish to apply the scroll-to effect.
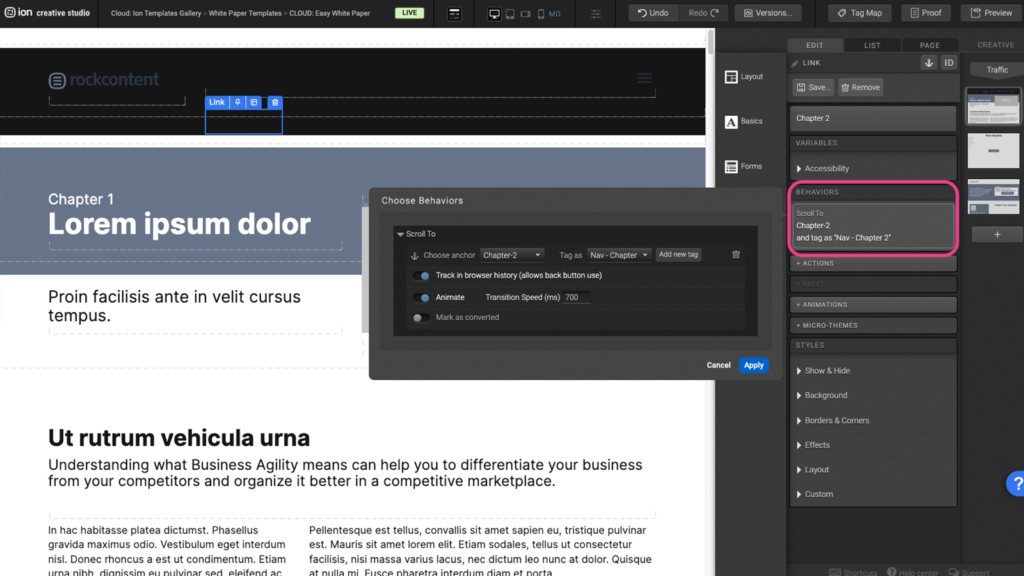
Step 3: Click under the Behaviors panel to open the Behaviors settings.
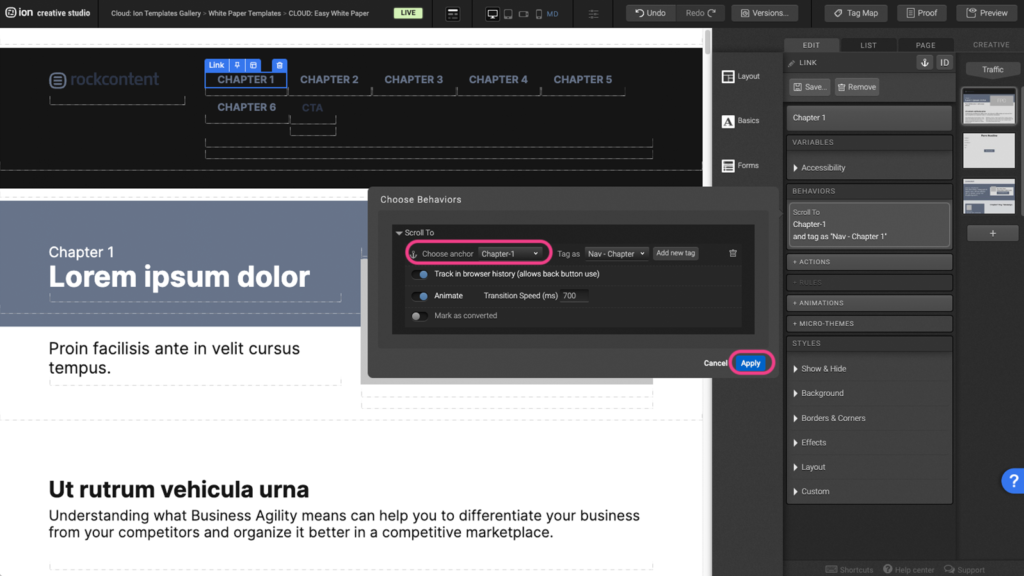
Step 4: Choose the desired anchor point from the dropdown menu then press Apply.
Animations
Step 1: To edit or to add an animation, first select the element you want to animate on the canvas.
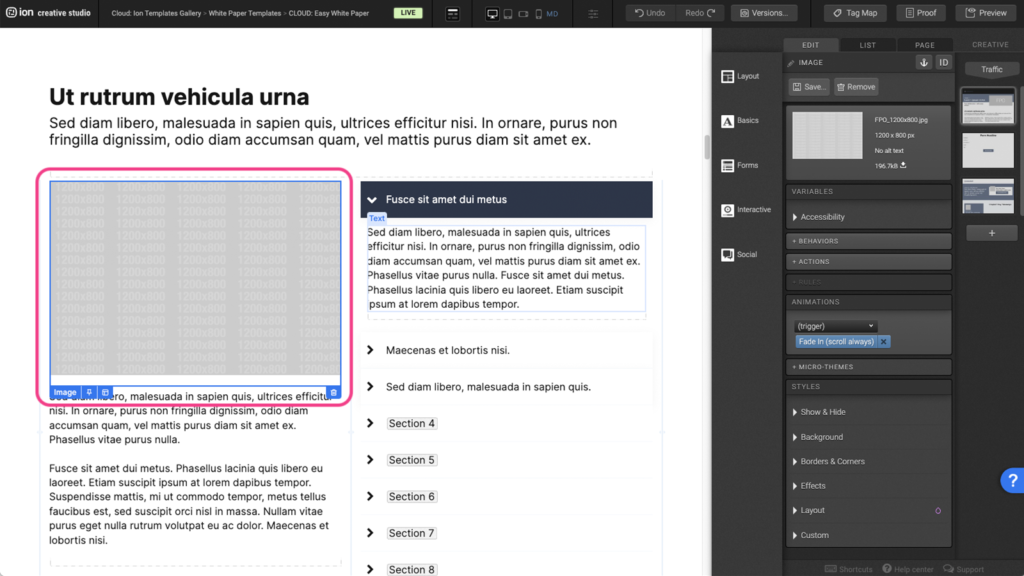
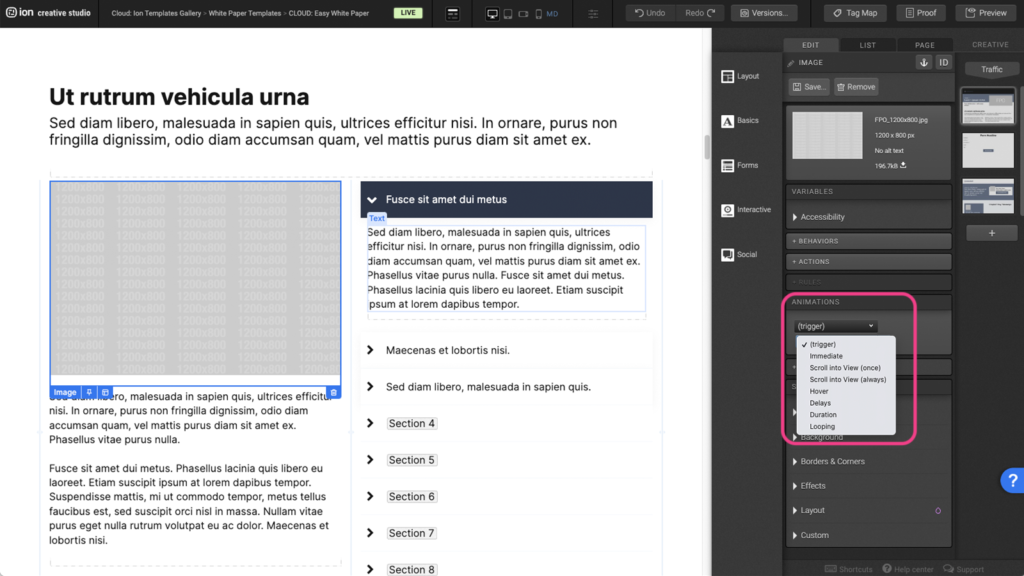
Step 2: Under the Animations panel, expand the (trigger) dropdown, and select an animation trigger.
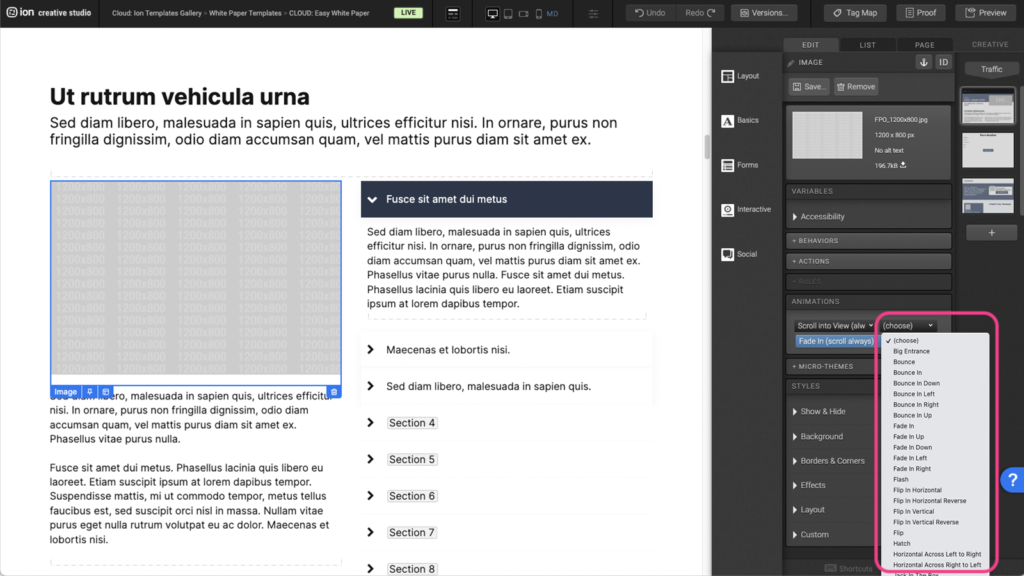
Step 3: After selecting the animation trigger, another (choose) dropdown will appear. Expand the second dropdown to select the type of animation you want to apply.
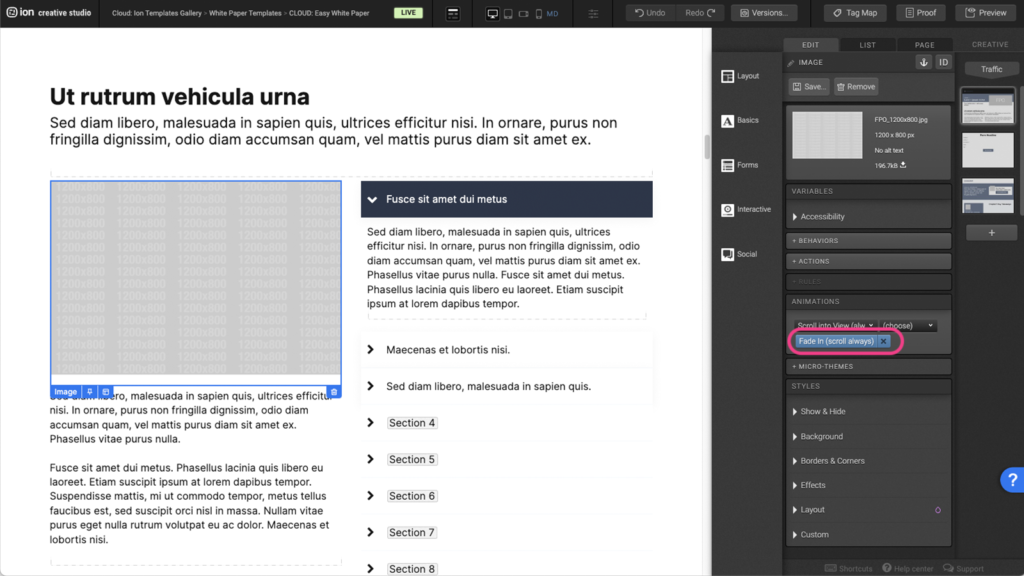
Step 4: To remove an existing animation, click on the X to the right of the blue animation tag.
Flow
Step 1: To update the content within your Flow, begin by selecting it on the canvas.
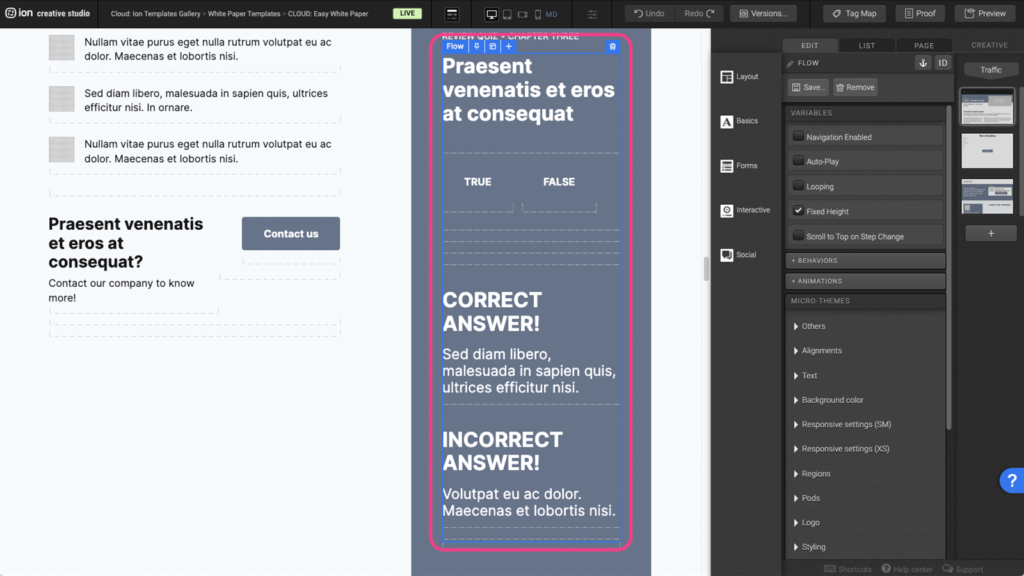
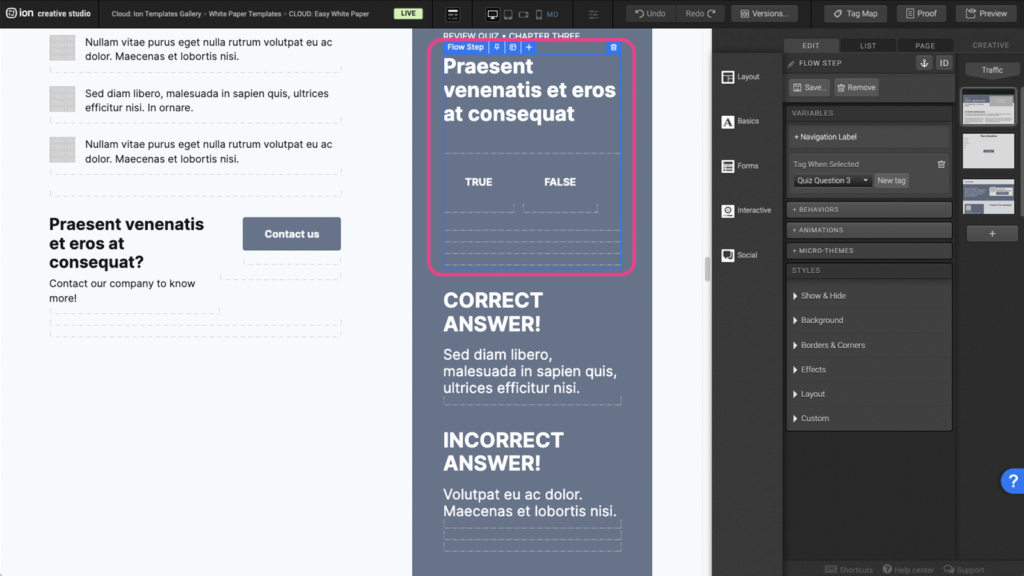
Step 2: Within the Flow, locate the first Flow Step at the top. You can edit the contents within the container, add content, or remove all of the content from the Flow Step.
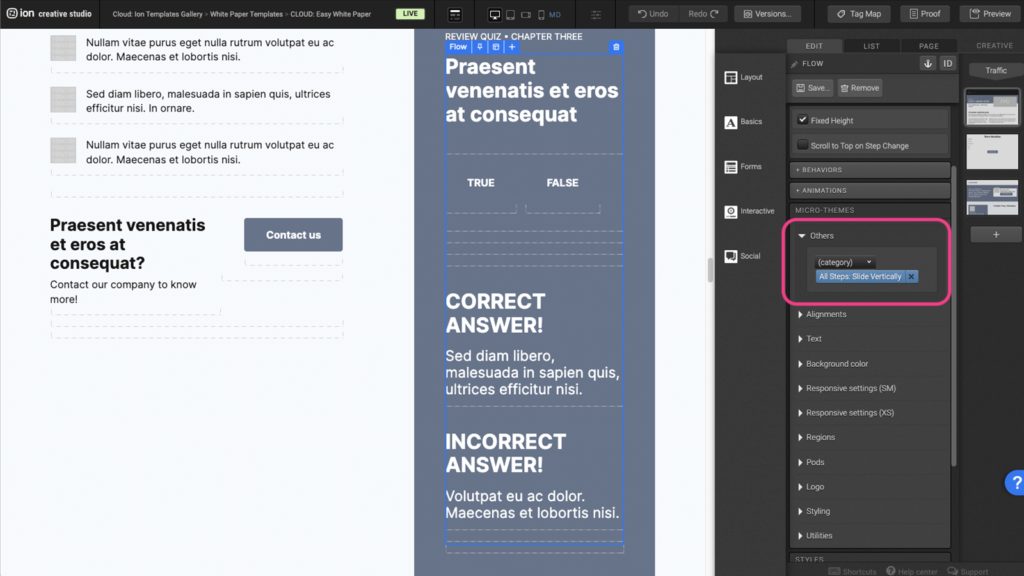
Step 3: To edit the flow step transition, layout, or to add arrows/progress bar select the flow and navigate to the micro themes. Expand the Others tab and select Flow then select the transition.
Form
Step 1: To edit the form, first locate the Form element on the canvas.
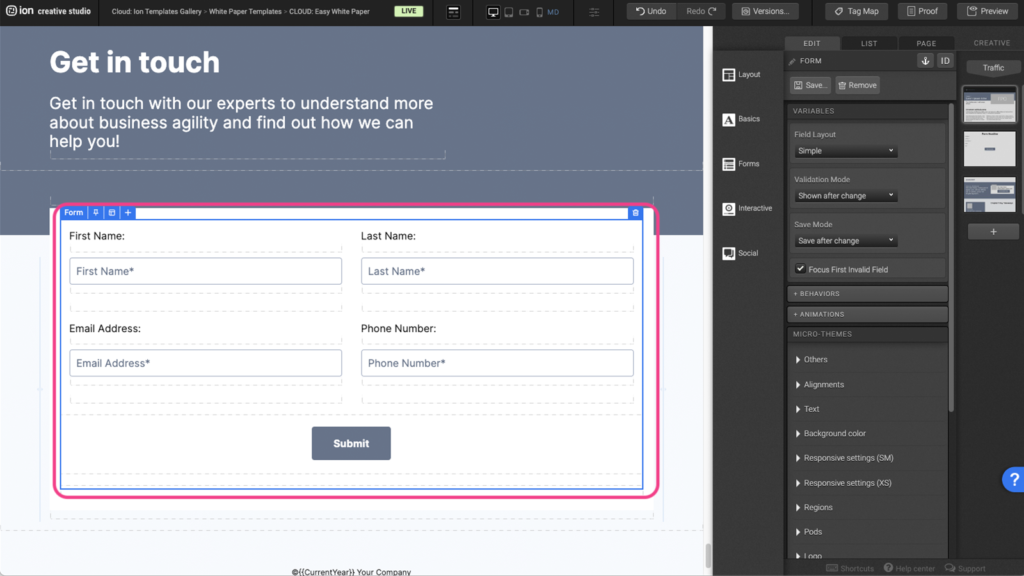
Step 2: Select the Textbox element to edit. Under the Variables panel, click under the Data Field to open the edit window.
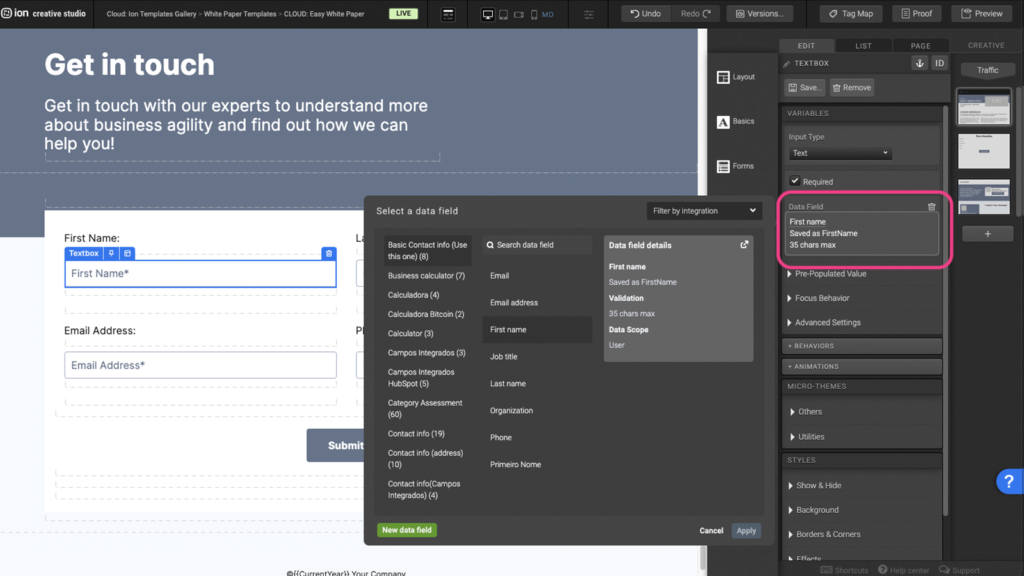
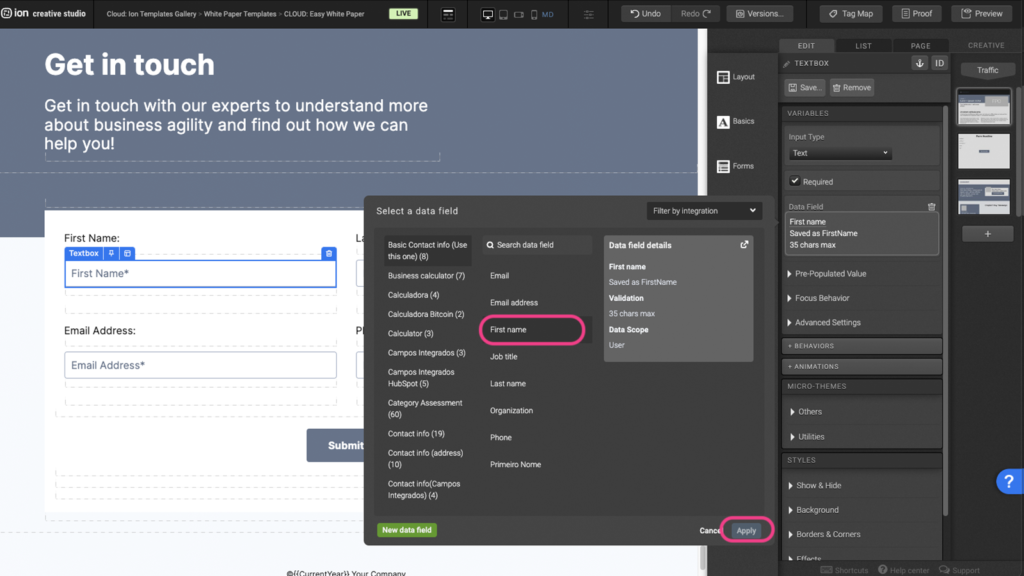
Step 3: Select a new data field then press Apply.
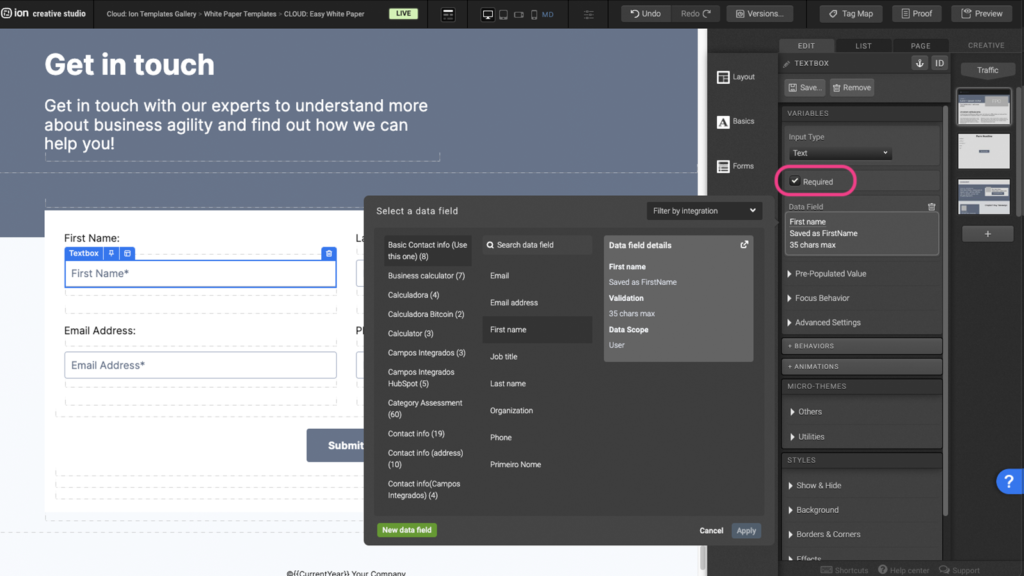
Step 4: You can make this field a requirement before completing the form by checking off the Required box under the Variables panel.
Lightbox
Step 1: To edit a lightbox, first select the Lightbox element on the canvas. Under the Variables panel, expand the Content tab.
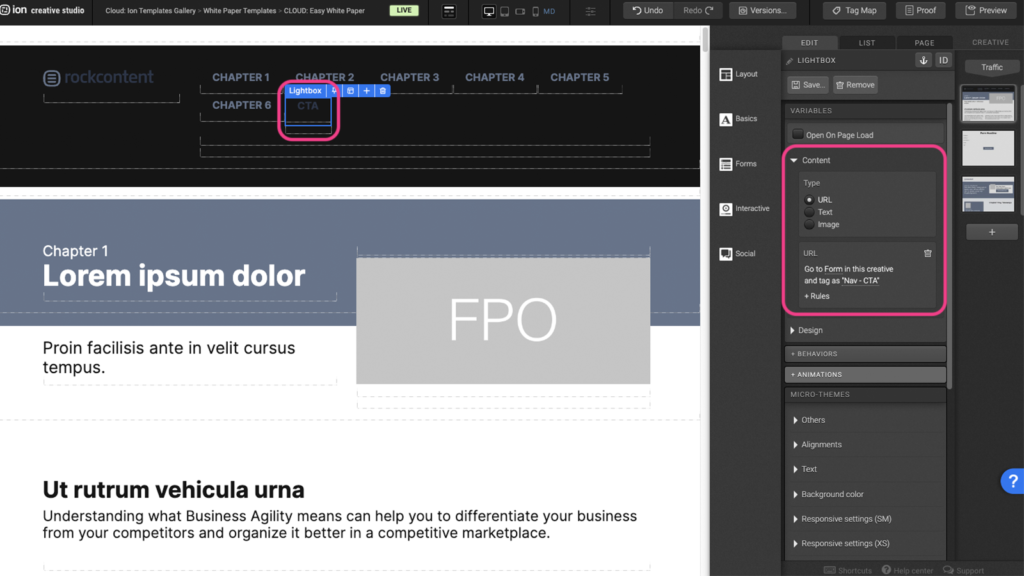
Step 2: You can choose the type of content you want to display. In this example, we are displaying a URL which links to the form page in this creative.
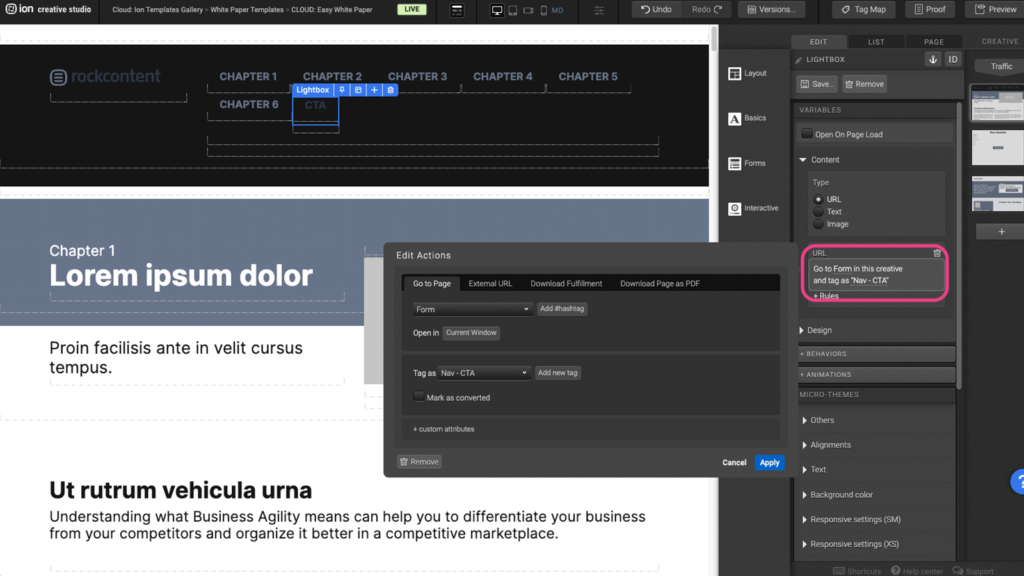
Step 3: You can choose to change the page by clicking on the URL to open the edit window.
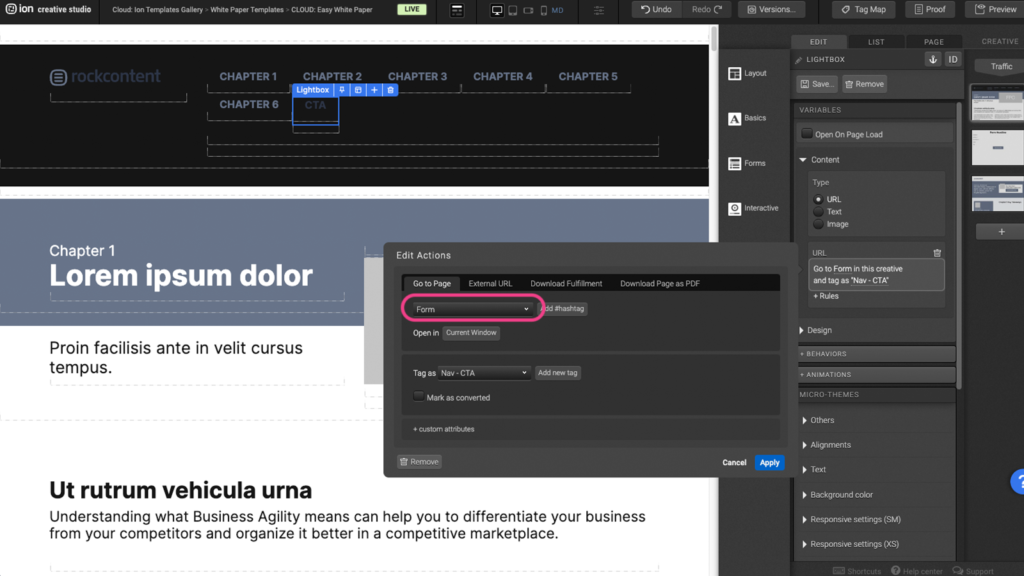
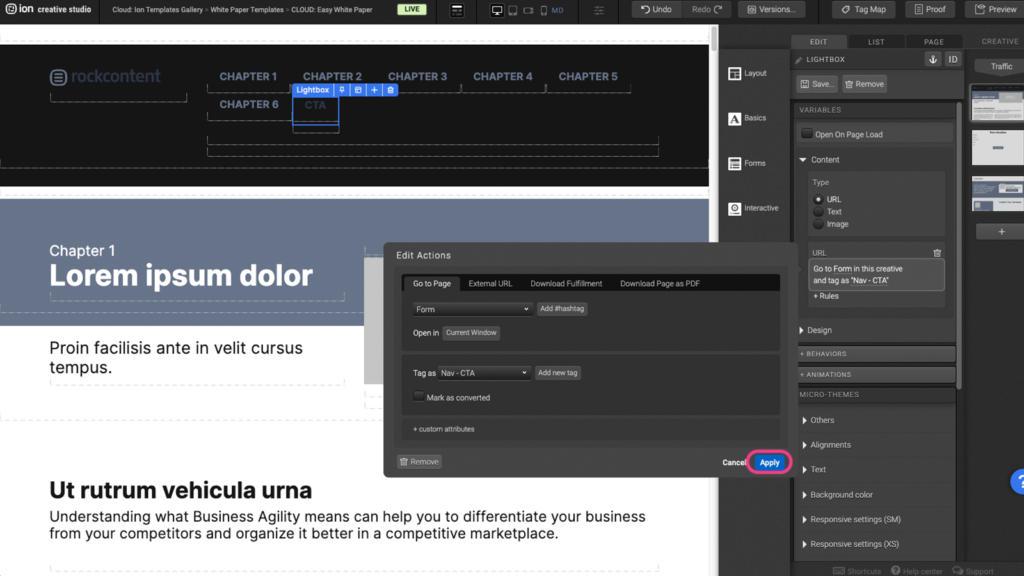
Step 4: Select the page from the dropdown menu and click Apply
Reveal
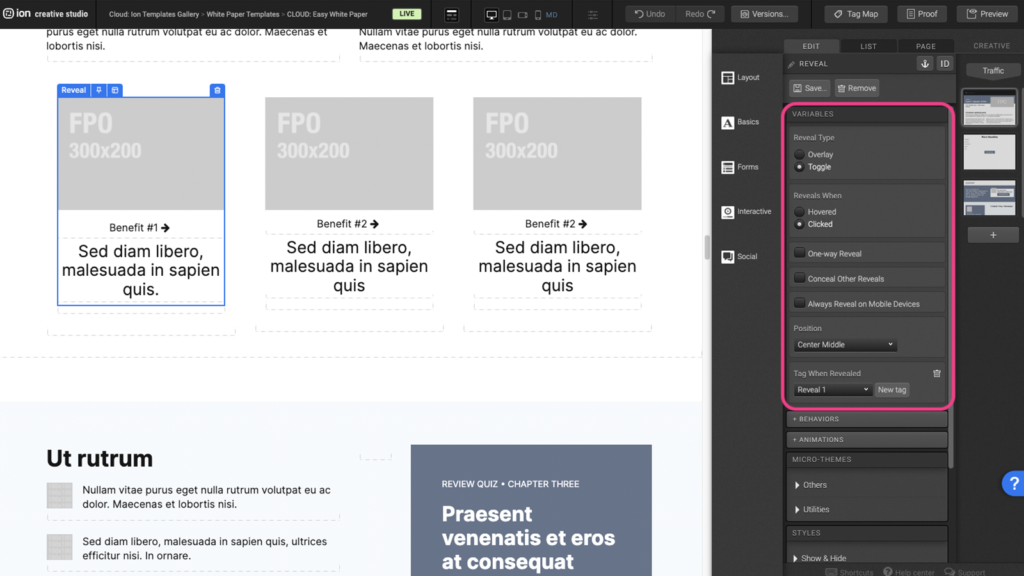
Step 1: To edit when the reveal container will appear, first select the Reveal element on the canvas.
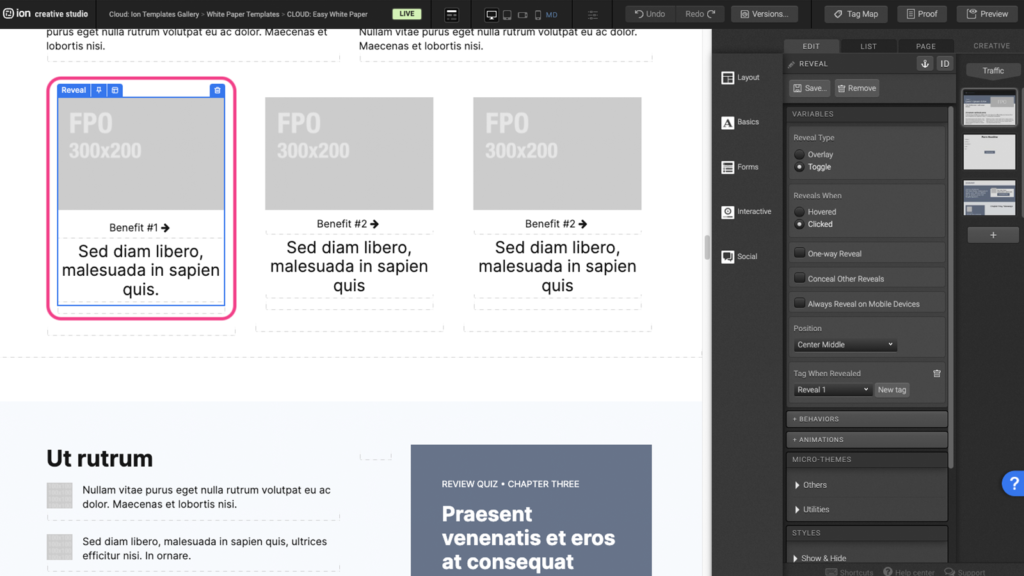
Step 2: Under the Variables panel, you can choose to change the Reveal type and when the reveal will appear by selecting from the options listed.
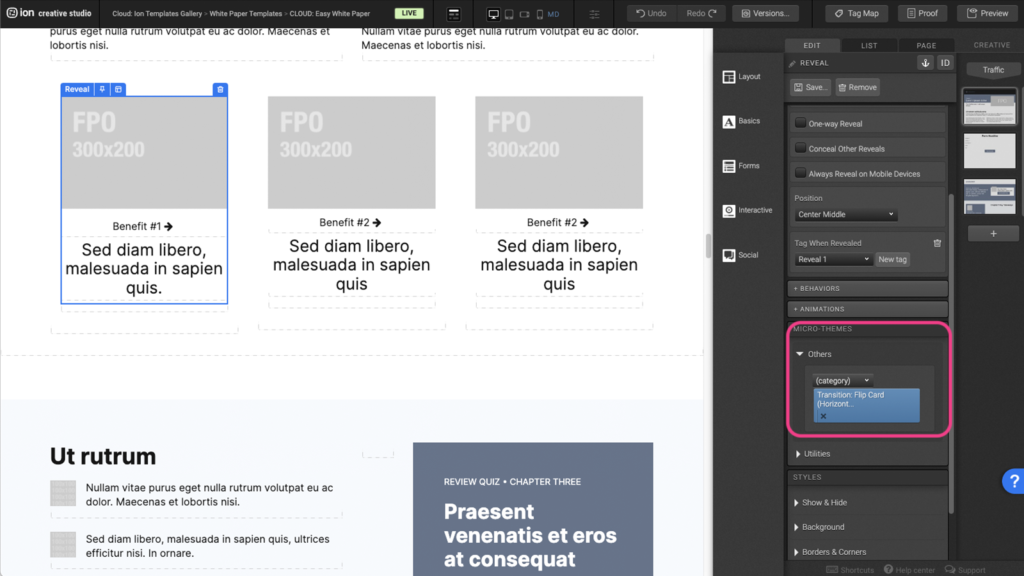
Step 3: The reveal options in the Micro-themes allow for different transition and overlay stylings.
Tabs
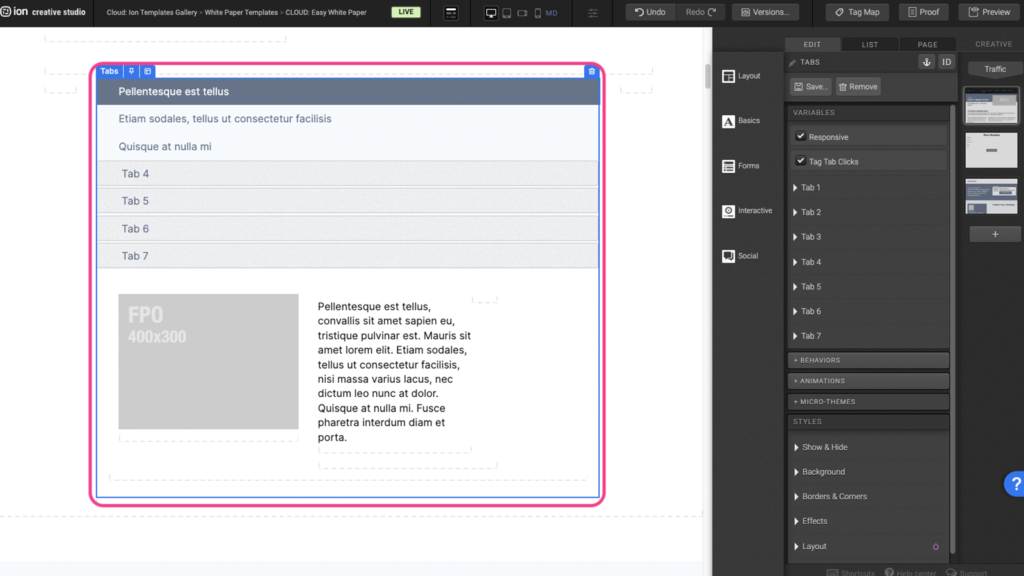
Step 1: You can add or remove tabs by first locating the Tabs element on the canvas.
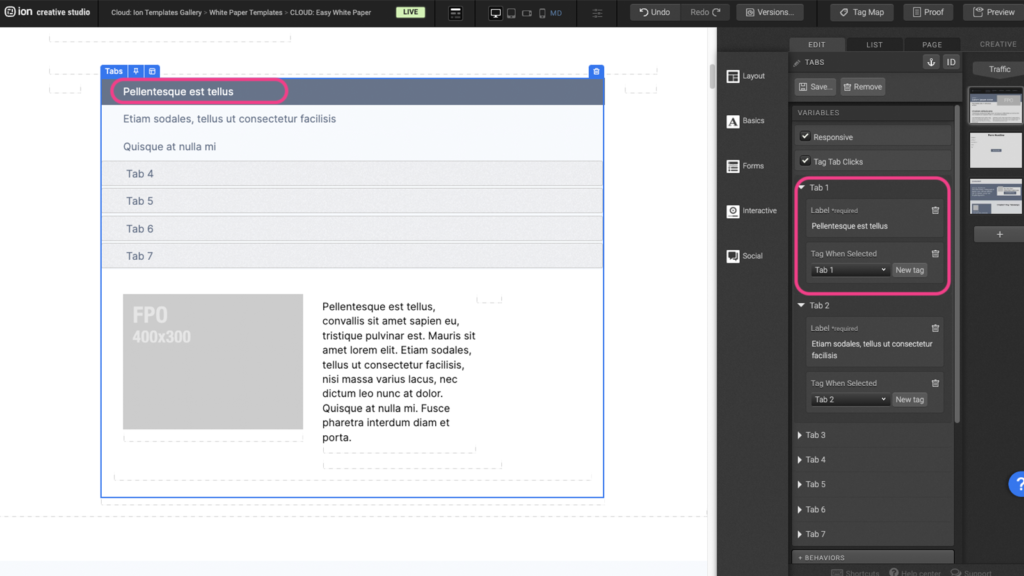
Step 2: You can edit or add a tab by looking under the Variables panel and expanding the tabs. Another option is clicking directly on the tab label on the canvas. This will automatically open the corresponding tab under the Variables panel.
Step 3: You can edit the contents within the tab by double clicking on the elements within the tab container.
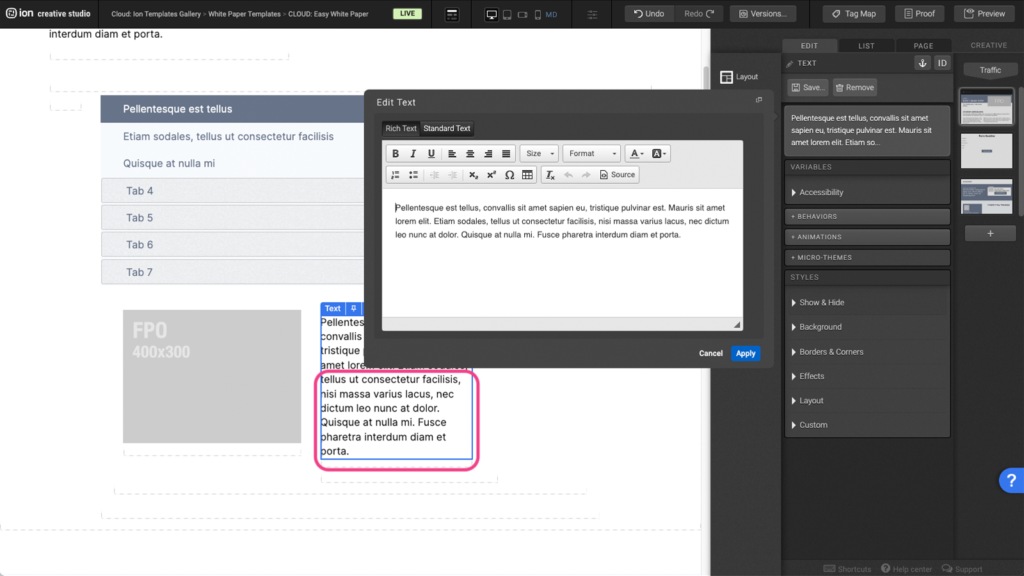
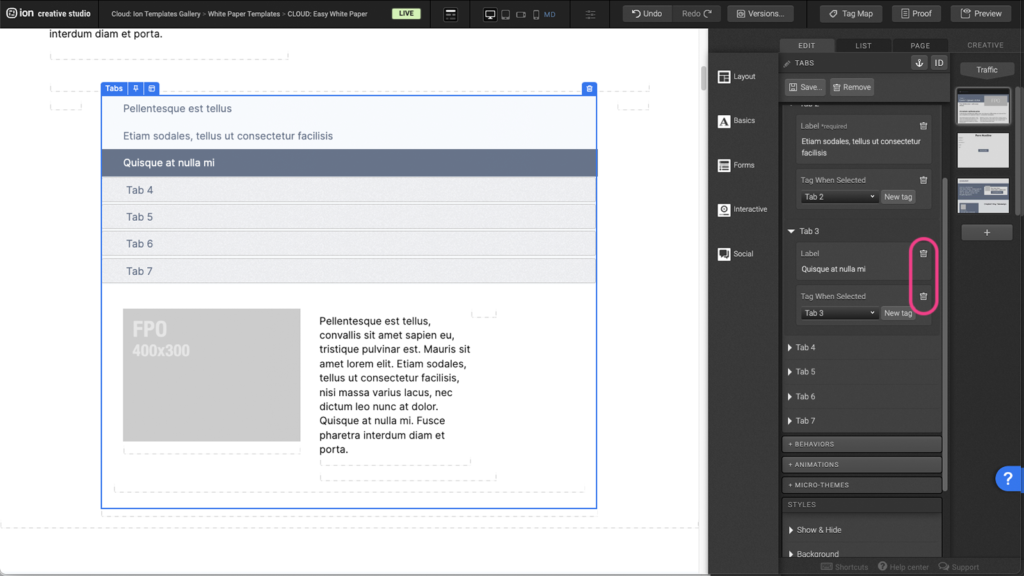
Step 4: To remove a tab, open the tab settings under the Variables panel and press the trash can icon to delete the Label. You will also need to delete any content within the tab container on the canvas as well.
Content Writing Template
Here is the content structure’s template to make it easier for you when providing content guidelines or creating the copy for this template, from understanding the content structure to getting to know the amount of words needed to each text piece.
Related templates
If you like this template, you might want to check out these other similar models.
Have a question?
Still have questions or are facing troubles when handling this template? Please do not hesitate to send any additional questions to [email protected], so we can make sure to have this article constantly up to date.


Social Profiles